1. About the guide
Prepare the device
Use the tablet. Android connected to the internet when using sync or online payment. For the cashier, the landscape position provides the most convenient POS workspace. Make sure the battery, date, and time of the device is correct.
Suggested work order
Complete the business profile → create a category → enter products and stock → set up a printer/payment method → make a user cashier → make a transaction → review the report.
2. Setup, Activation and Login
Login is done using a user account created by the Admin. Use personal accounts Do not use co-worker accounts so that transactions, cash, absences, and reports per staff can be tracked correctly.
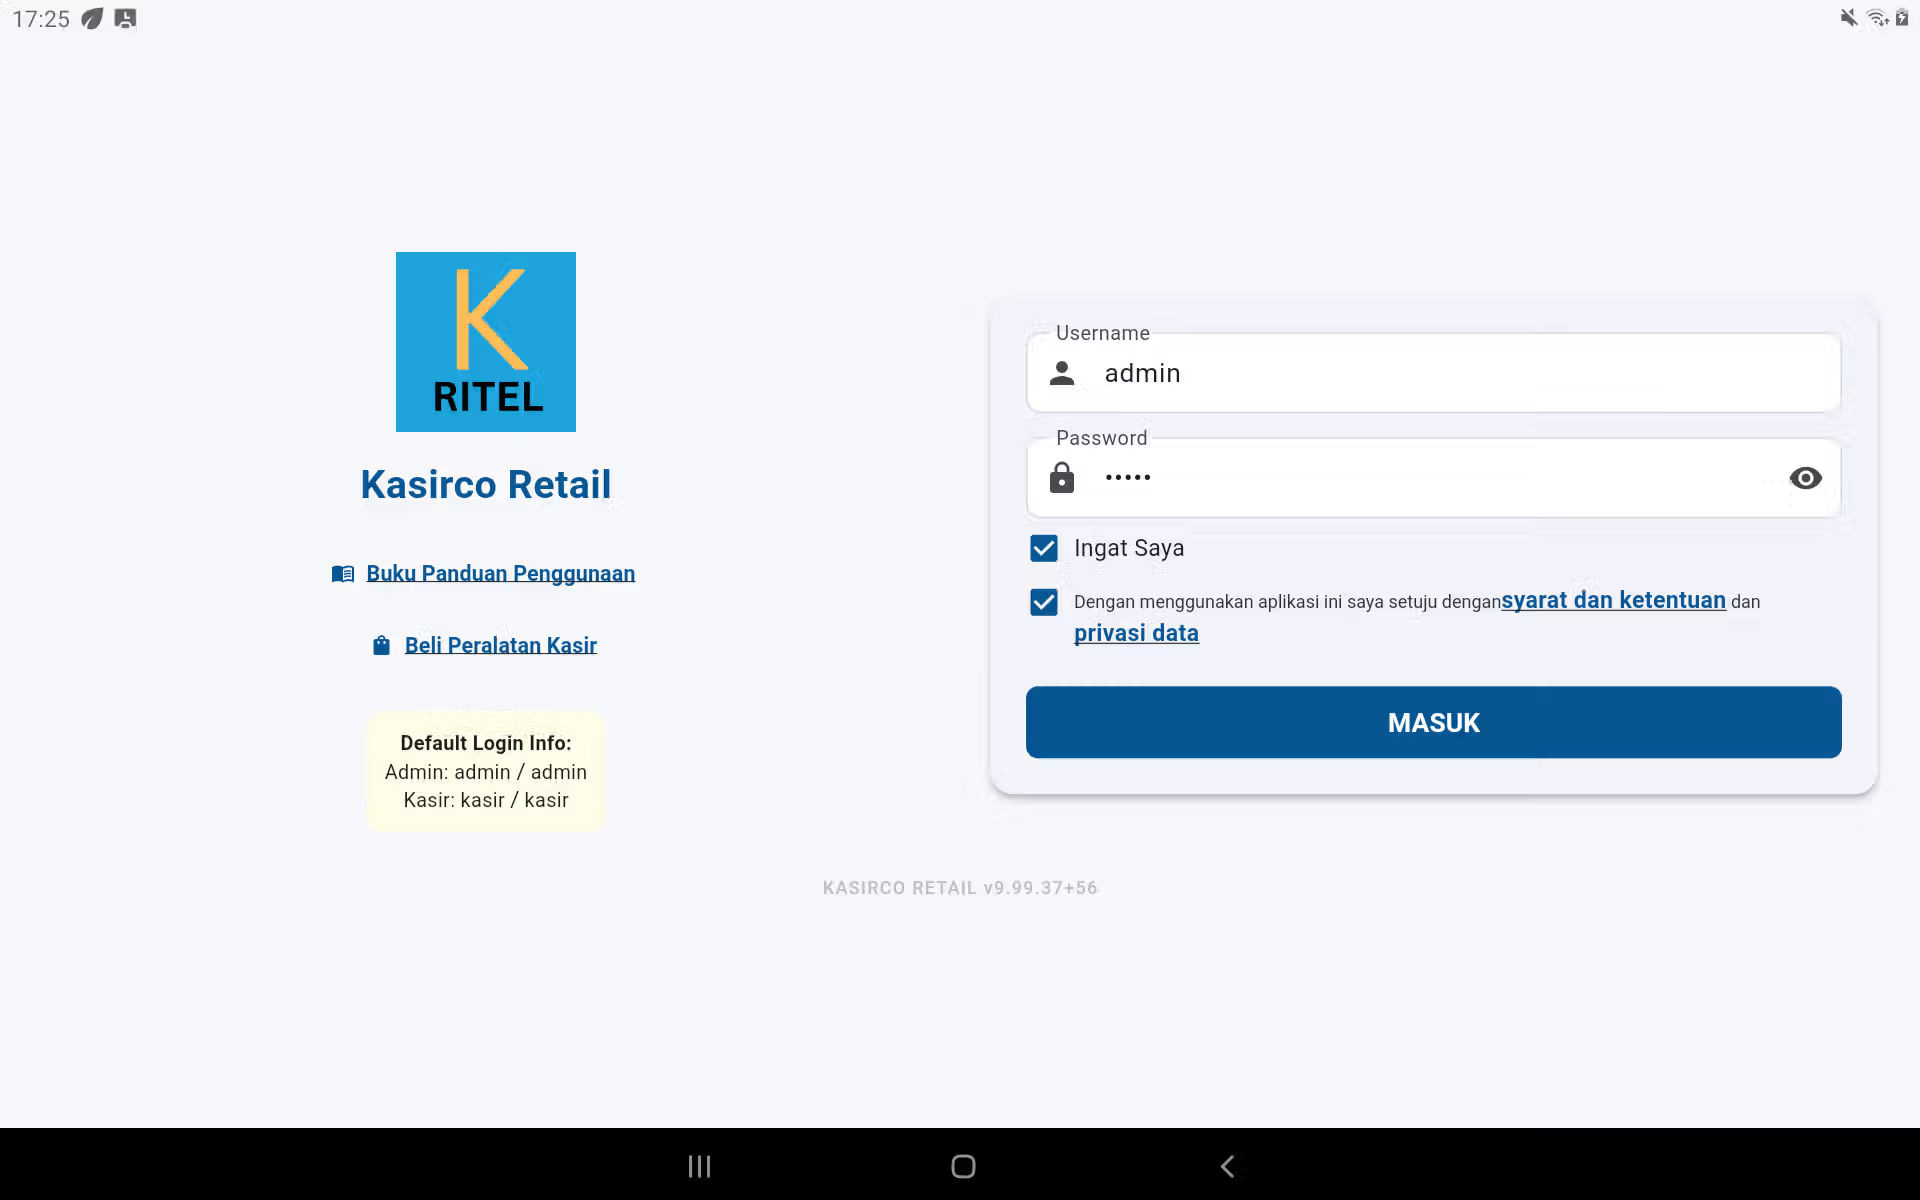
- Make sure the tablet is on, the time of the device is correct, and the connection is available when the business is using activation, sync, or online payment.
- Open up. Kasirco Ritel. On the login page, enter the user name and password given by the Admin, and then press Come on in.
- If credentials are stored on a personal/special cash register, use the credentials storage feature as per the business policy. Do not activate it on public tablets.
- Once you're in, make sure the username and business name on the POS are correct. Take a leave of absence when shift policy requires it.
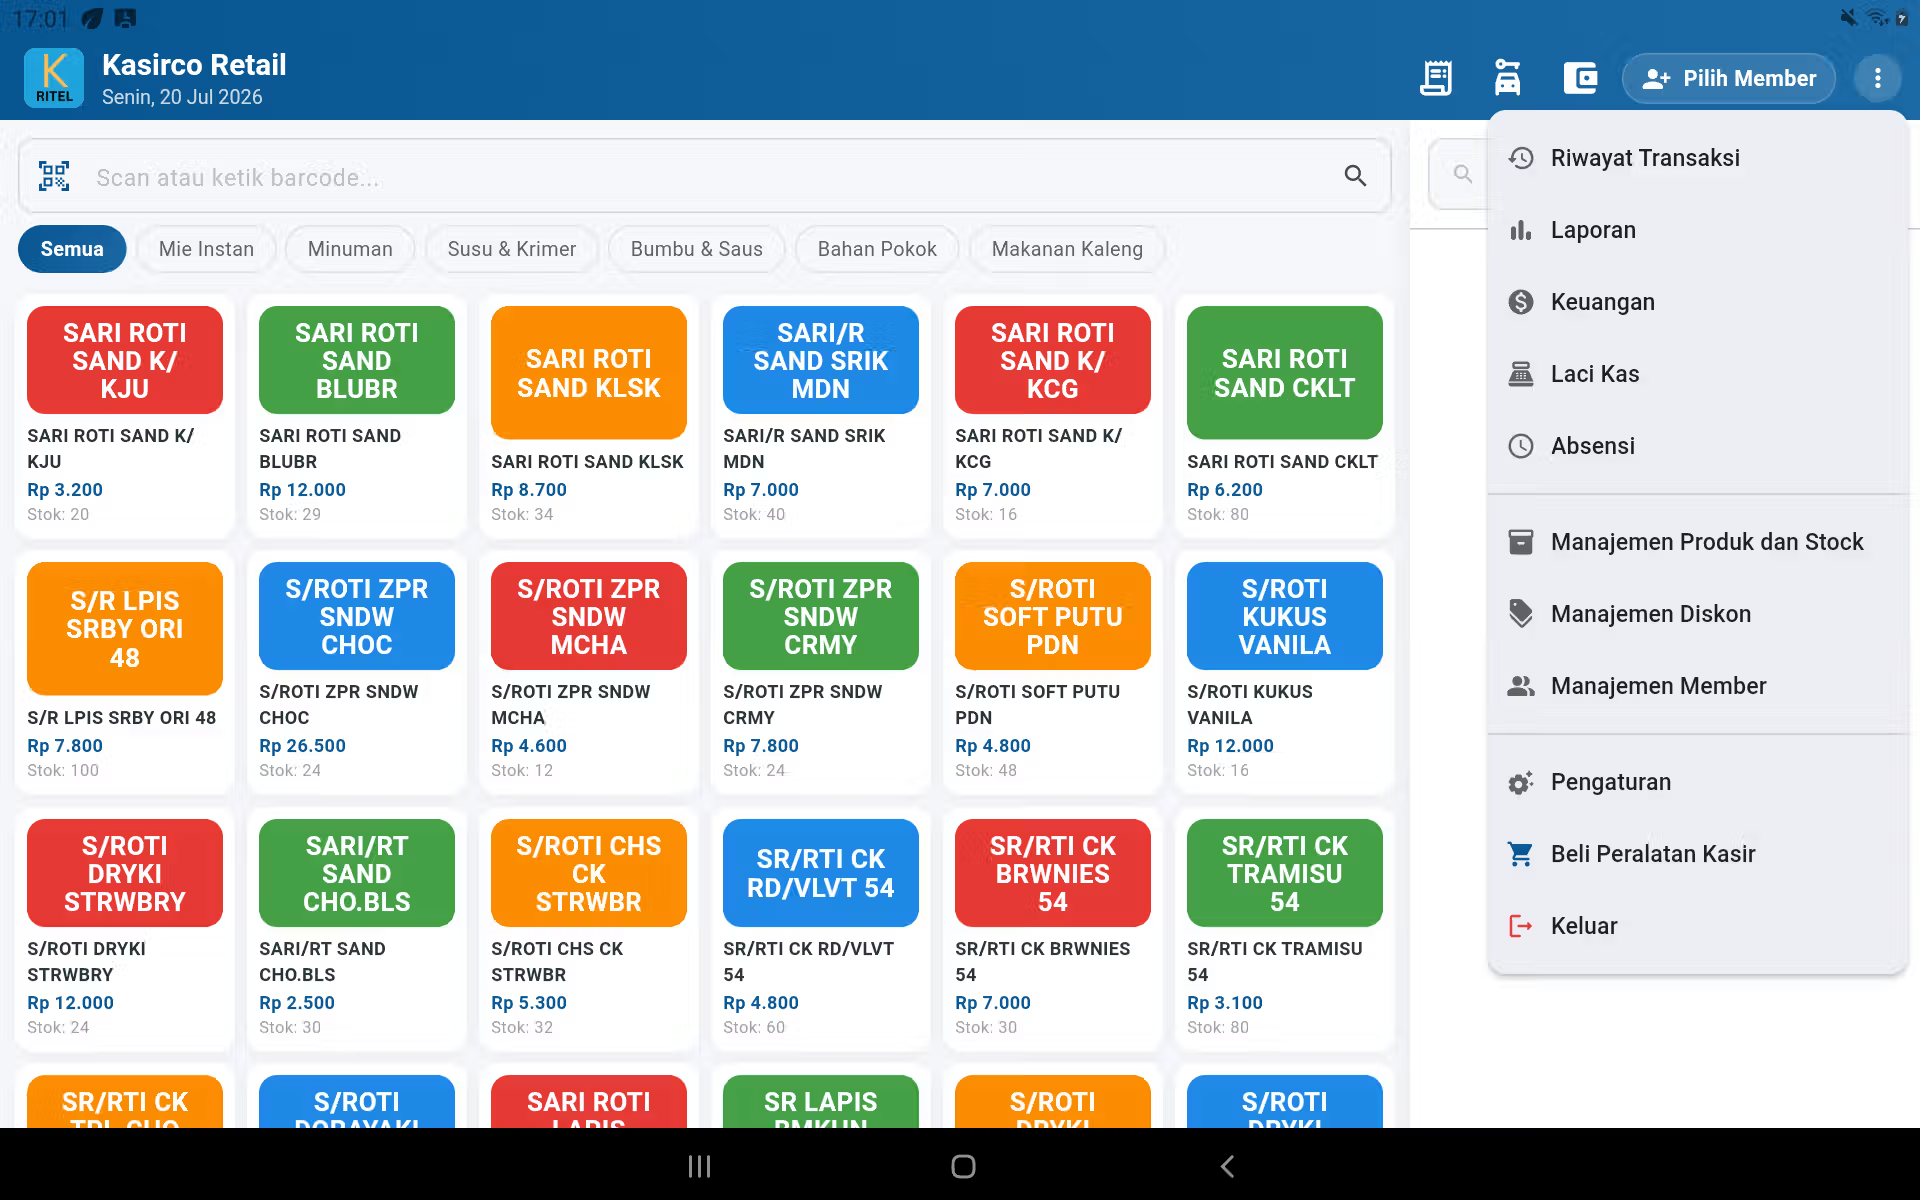
- To get out, open the main menu and press Get out of here.; don't just close the app on the shared device.
Initial activation and licensing
Complete activation/licensing with an authorized business account before the operational day. Check the device's identity and active status from the license/information page. When the device is replaced, follow the available purchase recovery procedure, not making a second purchase automatically.
01 The Kassir
Sales at the POS
The POS page is the cashier's work center. Products can be selected from a product card, searched by name, or entered via barcode.
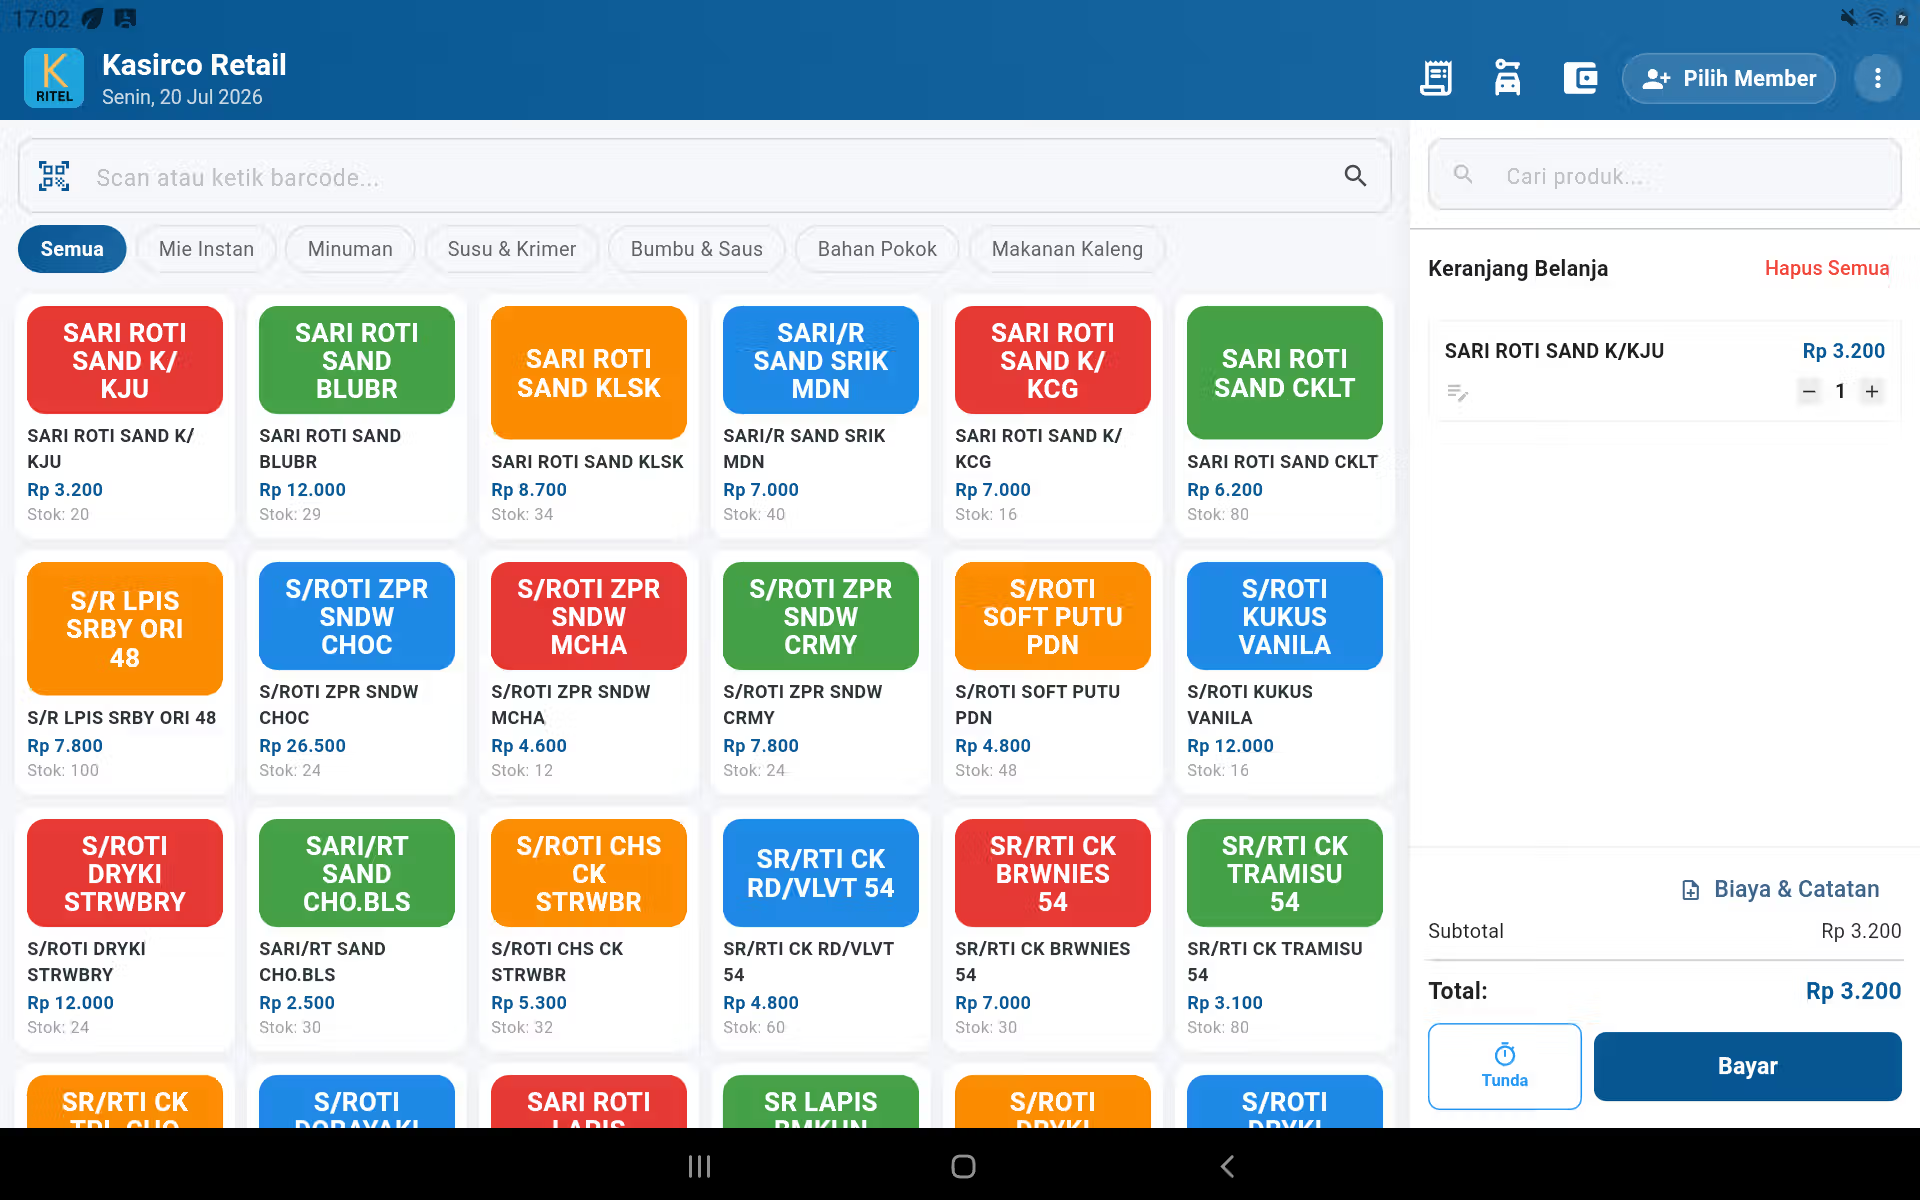
- Put the product in. Tap on the product card, select a category, search for a name in the search box, or focus the column Scan or type a barcode Then scan the packaging.
- Check the cart. Change the number with the −/+ button, delete the wrong item, or use Get rid of them all. to cancel the entire cart before payment.
- Add context to the transaction. Use it Select a Member When the customer is registered. From Costs & Notes, add extra fees or notes if necessary.
- Save it if it's not finished. Press the button. It's late. so that the order does not go missing and can be reopened from the delayed order.
- Keep going with the payment. Press the button. Pay it, select the method and make sure the nominal is correct before pressing the last pay button.
4. Transactions, payments, discounts, and pay later
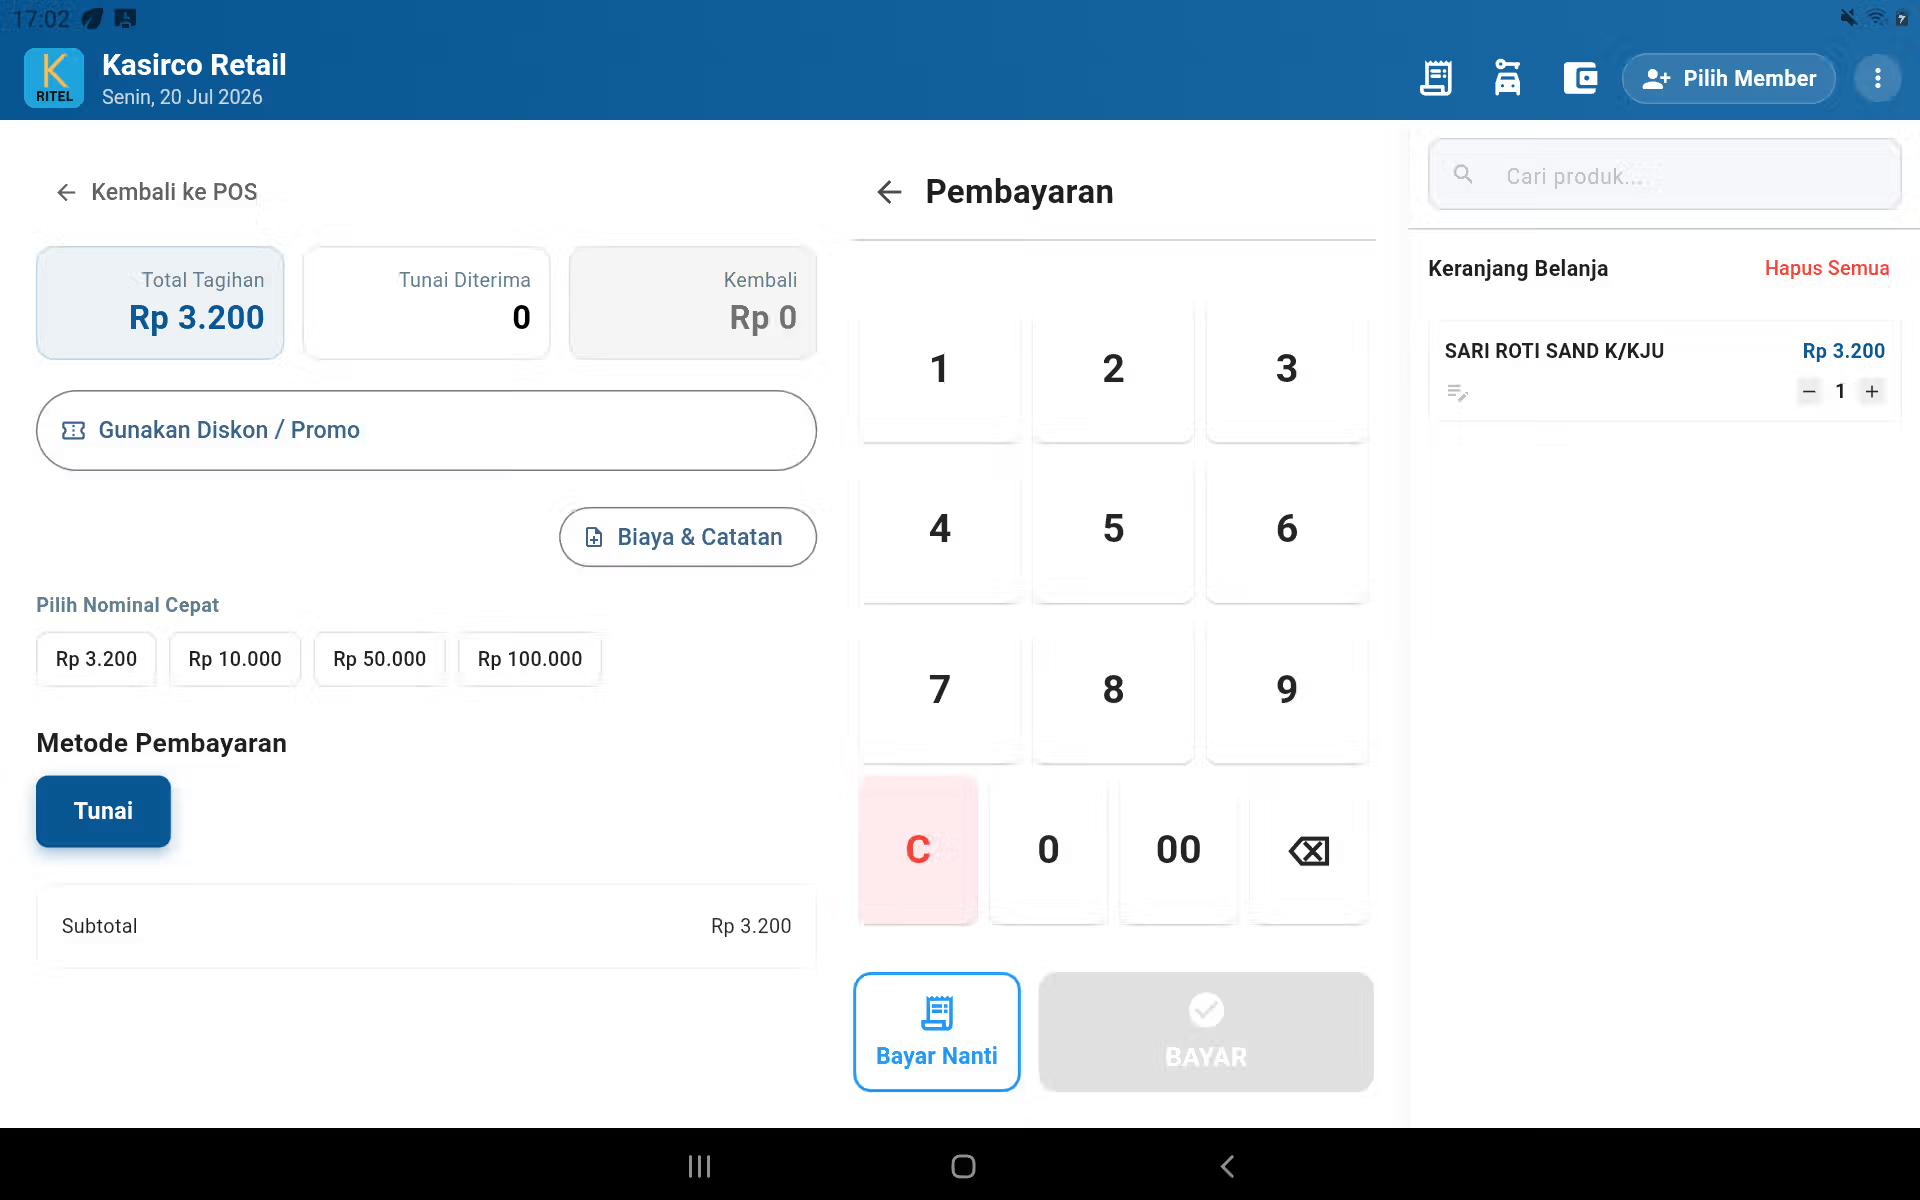
- Cash: Put the money in, get it; the system displays the return.
- The non-existent: Select methods that have already been activated by the Admin (e.g. transfer, QRIS, or payment gateway), then follow the payment status that appears.
- Discounted: Press the button. Use the discount., select the applicable discount, and check the discount value before you pay.
- Pay it later: Use only when the customer and the value of the debt are clear. The transaction will go into debt management for later charging.
5. History of transactions, structural adjustments and corrections
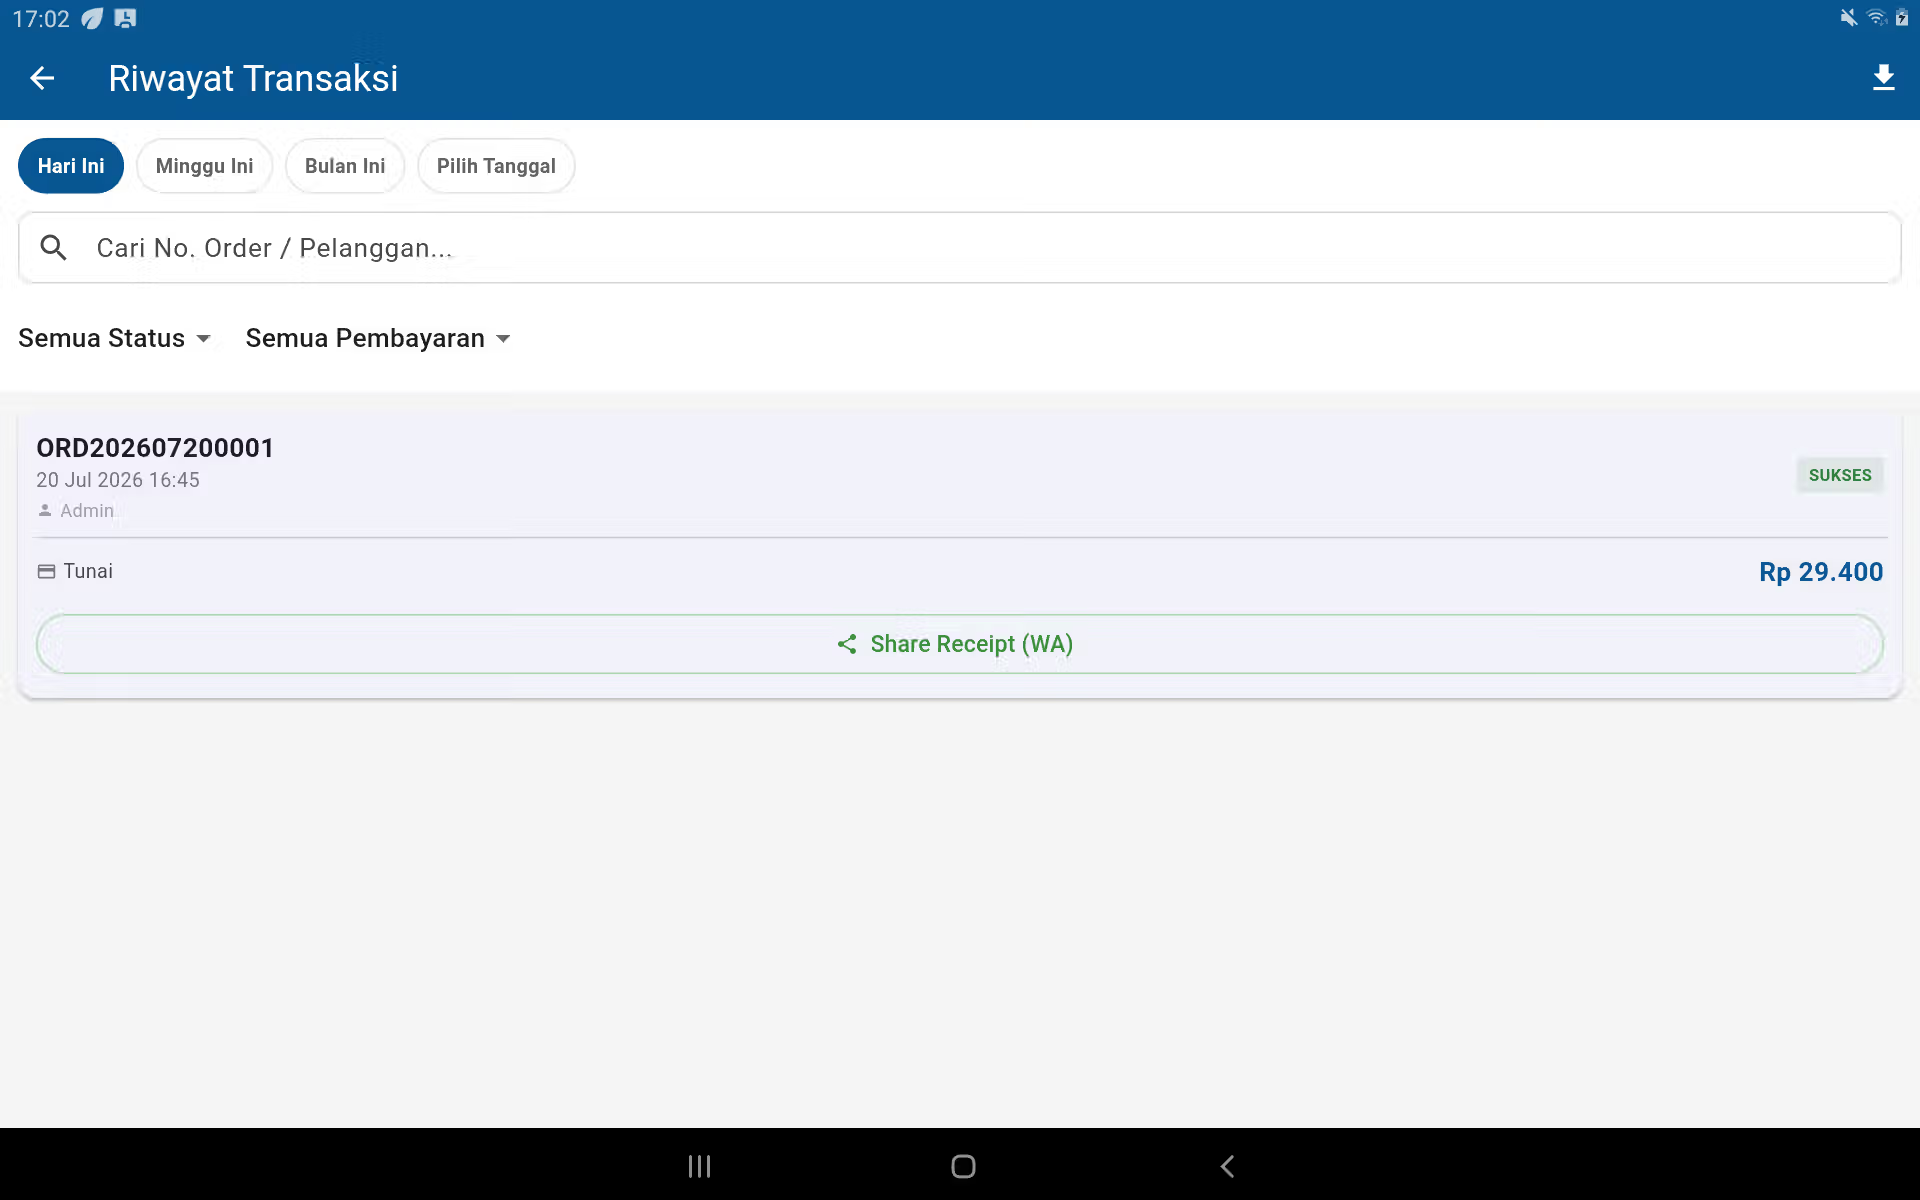
Open the menu The history of the transaction From the main menu. Use the Today, This Week, This Month, or Select Date filters; find the order/client number; then open the transaction to see the details and take any action permitted. Cancellations/returns/voids must follow the business policy and the right of access. Do not delete data to correct sales using the correctional trail available to keep track of audit and reporting consistent.
The following is a list of the countries of the European Union:
6. Category, products, stocks and suppliers
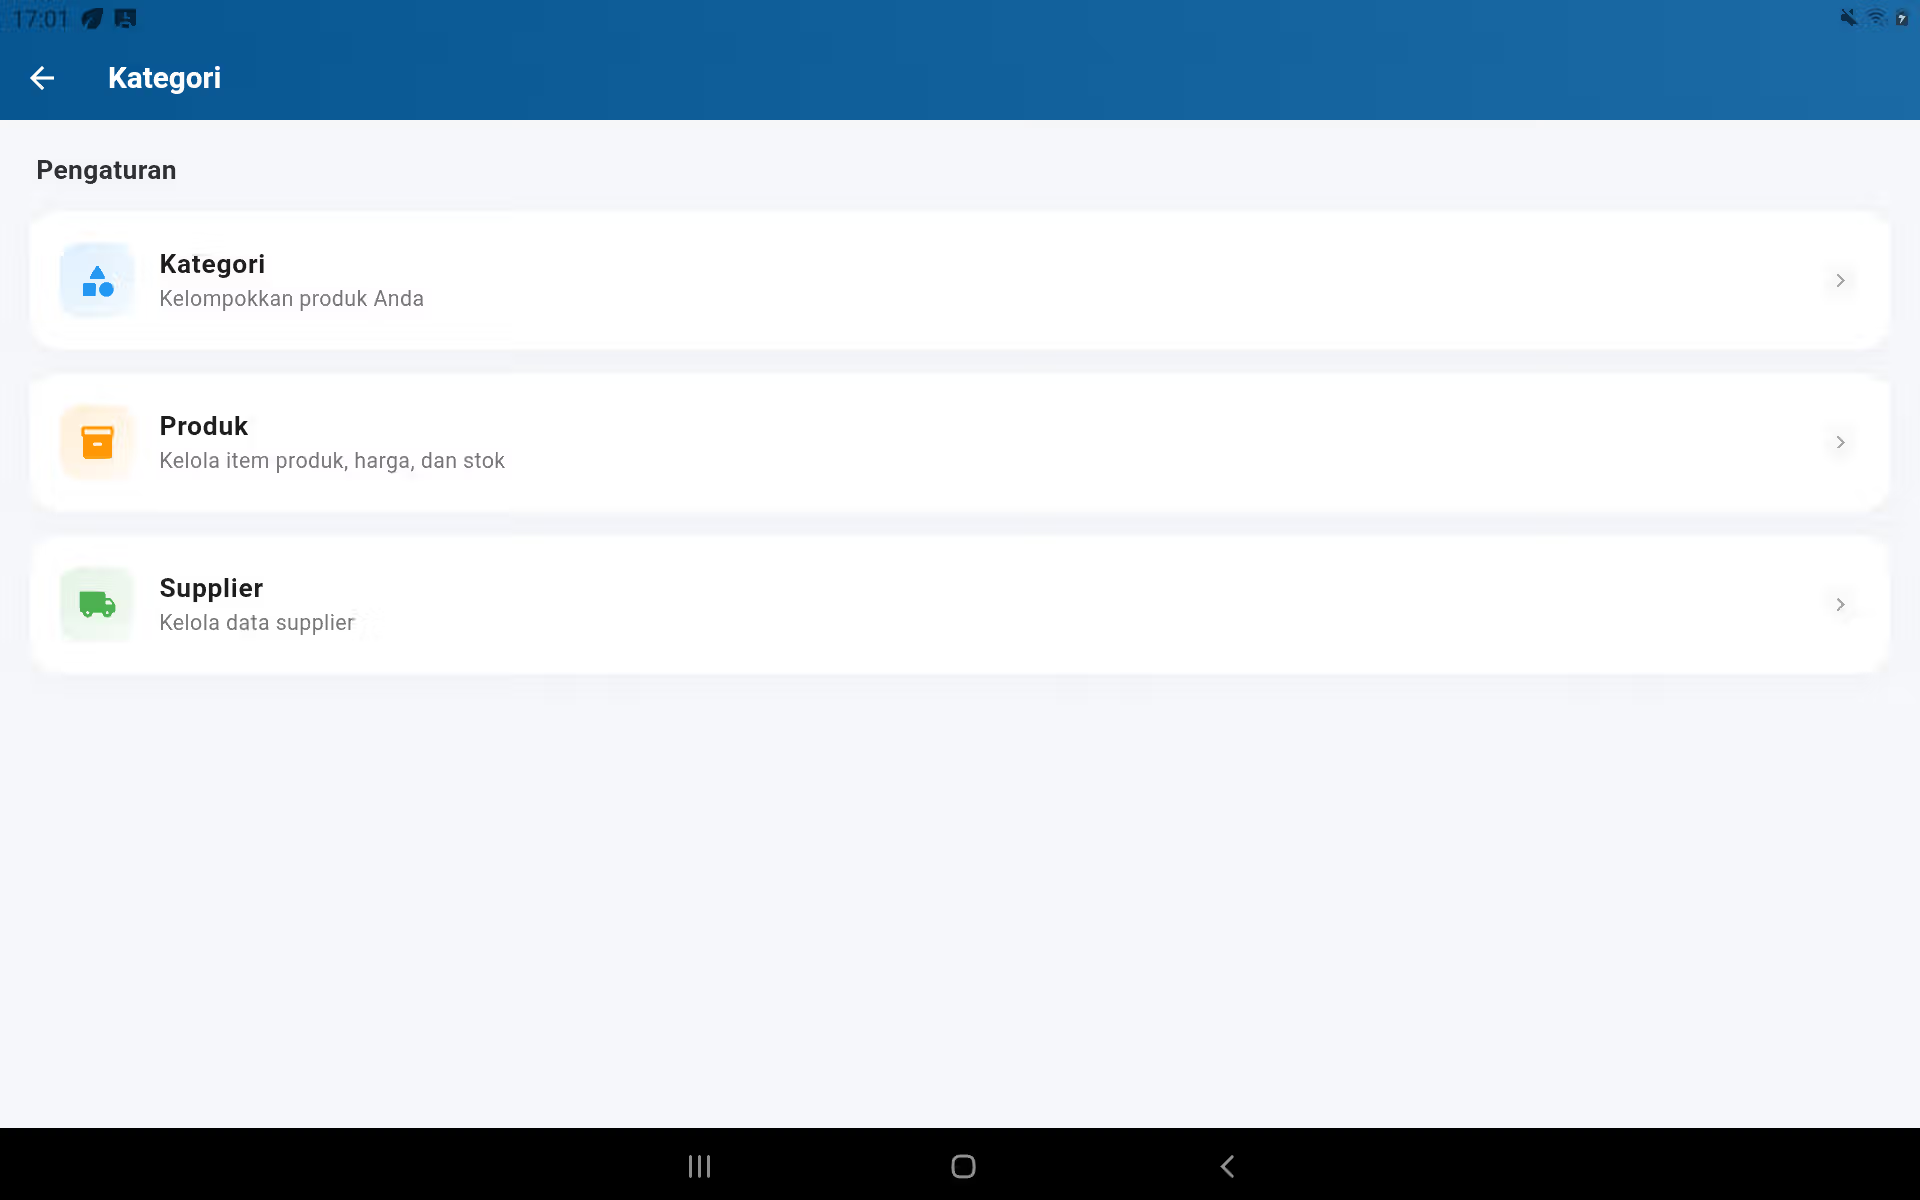
Product data structure
1. The category
Create groups like Drinks, Food, or Tobacco to make the POS search faster and report more neatly.
2. Product
Fill in the name, category, sales price, barcode, unit, initial stock, and other relevant information. Avoid double barcodes.
3. Supplier
Keep the name and contact details of suppliers to make purchases, inventory history, and searching for items easier.
- Open it up. Main menu → Product and stock management.
- Create a category first, then add the product with the add button on the product page.
- Enter the price carefully, set a unique barcode, select a category and save.
- Test the product by finding it or scanning the barcode from the POS before using the cashier.
How to create a category
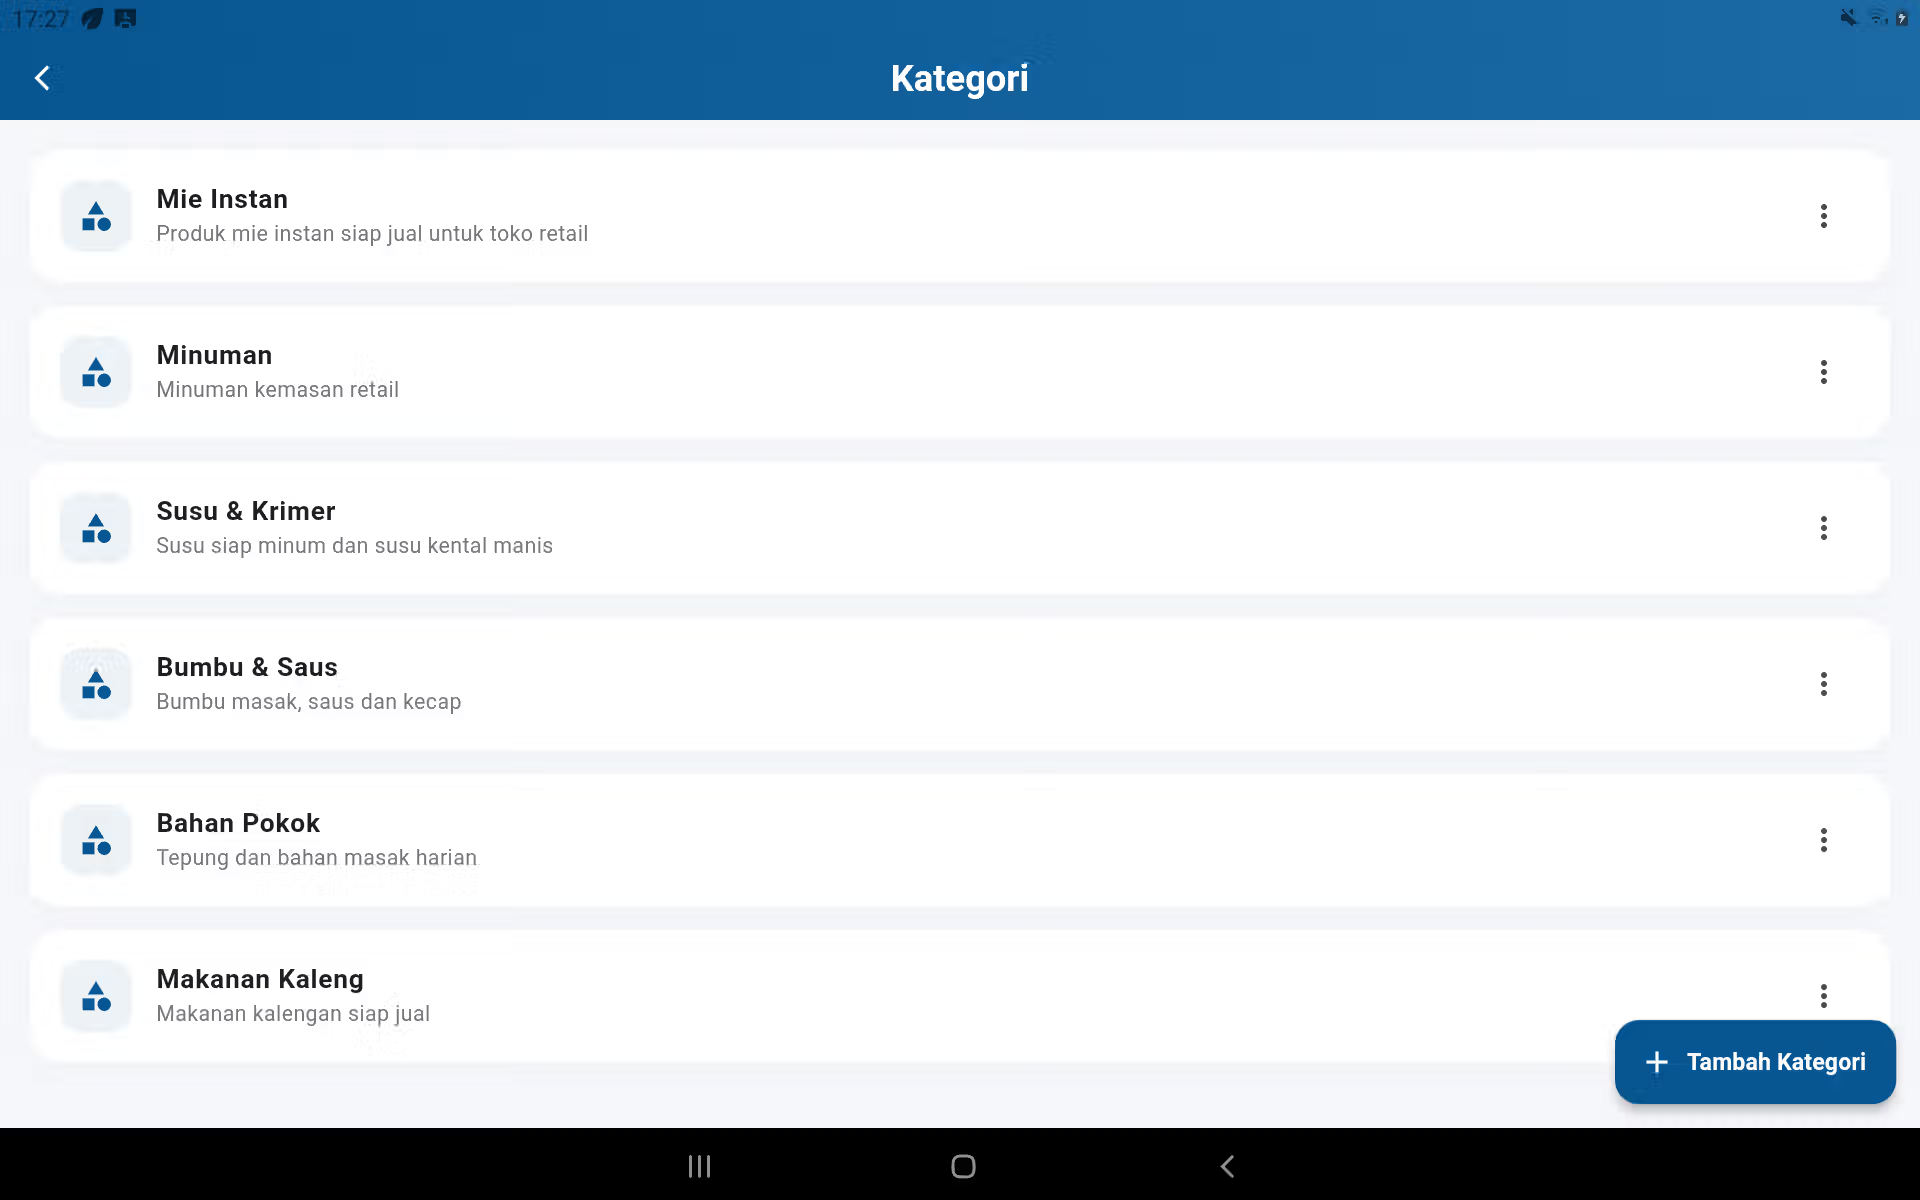
- Open it up. Main menu → Product and stock management → Category.
- Press the button. Added Category.
- Fill in a short and easily recognizable category name for cashier, for example Cold Drink or ATK.
- Fill out the description if necessary, then keep it.
- Go back to the POS and make sure that category shows up and is selectable.
Select the item type first
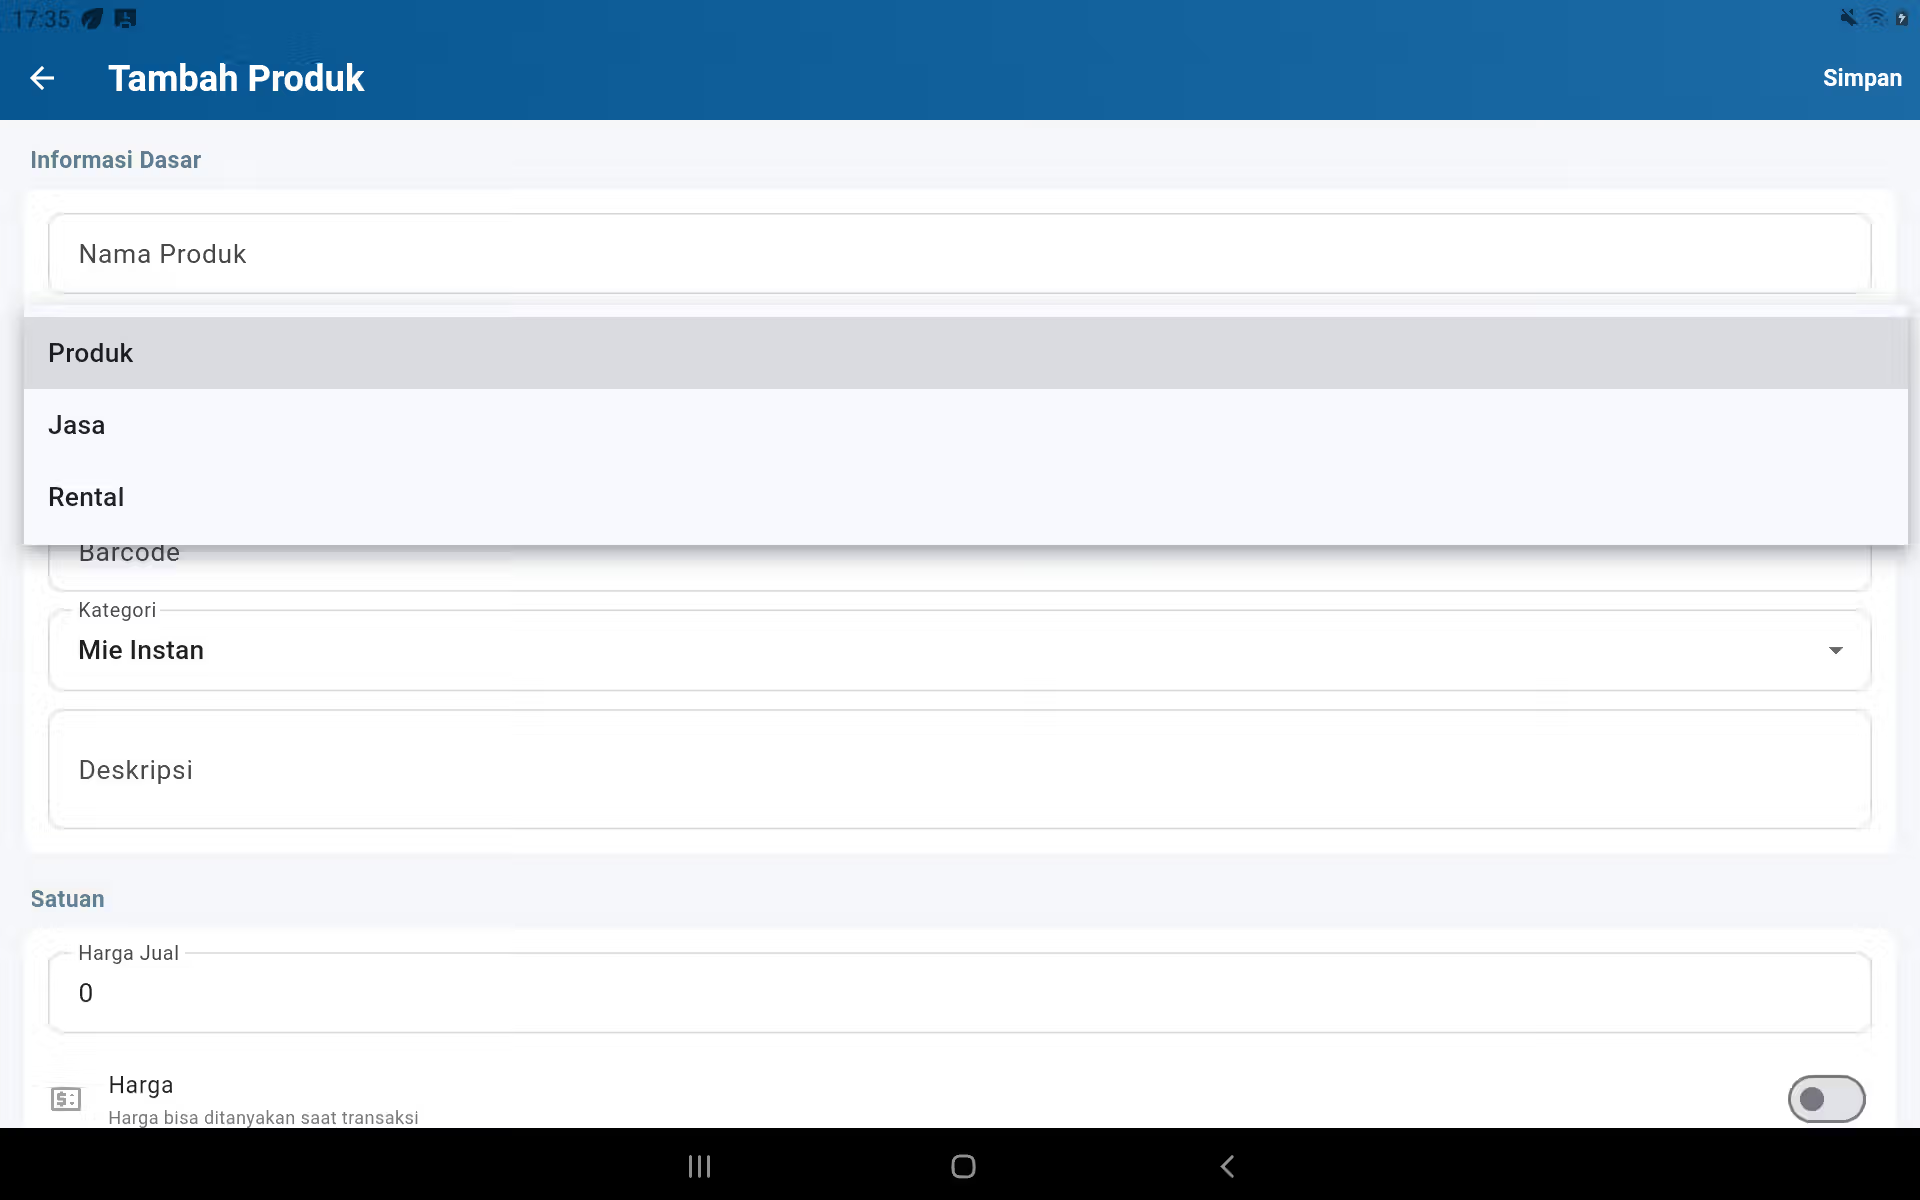
Get in there. Product and stock management → Product → button +. On the column Type of Item, select one type before continuing charging. Do not use one type for all needs because the stock and process after the transaction may differ.
1. Product input
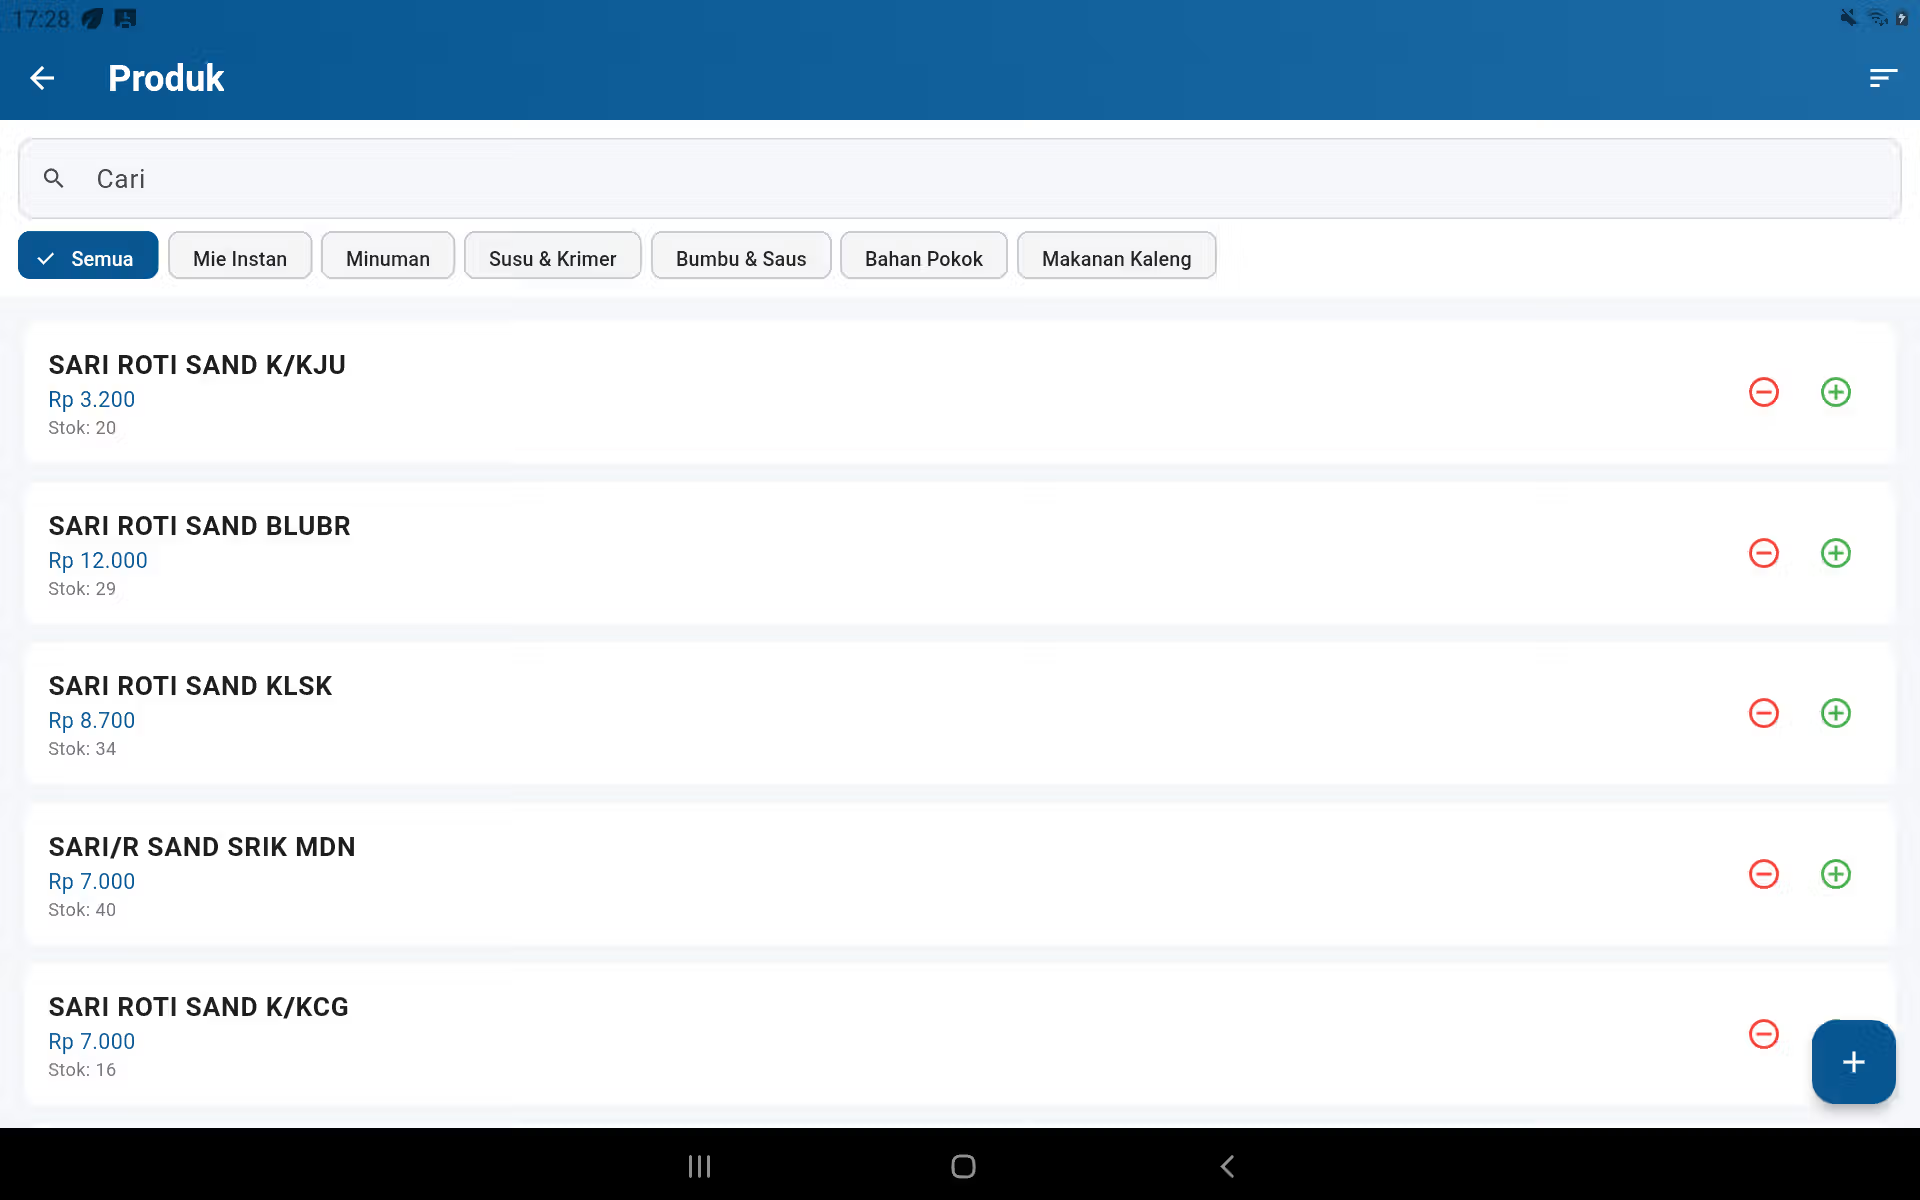
- Choose Product on the item type. Use for physical items such as food, drink, tobacco, ATK, or commercial items that need to be controlled in quantity.
- The content Product name, SKU when attempting to use it, and Barcode It's unique when things are scanned by a scanner.
- Choose The category, the description content and the correct units (pcs, bottles, dusts, kg, etc.).
- The contents of the sale price, the capital price/HPP when used, the initial/minimum stock, the supplier, as well as the expiry for the expired goods.
- Press the button. Keep it. Search for items at the POS and conduct a one-time test transaction to check prices and stock reductions.
2. Service input
- Make a new item and then select The service on the item type.
- Fill in the name of the service clearly, for example Delivery Services, Fee Services, or Packing Services. Select a service category so that the report is easy to sort.
- Fill the sale price. Barcodes and physical stocks are filled only when used by business procedures; services generally do not require stock of goods.
- Save and test at the POS. Ensure that the service is included in the total transaction and that the tax/service fee is applied in accordance with the arrangements.
3. Rental and rental
- Make a new item and then select Rental on the item type.
- Fill in the name of the item or rental service, category, unit, price, and information required by the business. Use a name that makes it easier for staff to recognize the item when they return.
- Keep it. From the POS use the active rental trail to select customers, record payments or advances if applicable, and monitor the rental status.
- When the goods return, complete/declare the rental status under the actual conditions so that the rental data is active and the bills are not left behind.
7. Stock control, expiry, and supplier
Stock, expiry, and supplier are recorded at the time of receipt of the goods. The three are interrelated: stock adds to inventory, suppliers become the source of purchase/debt, and expiry prevents expired goods from being sold.
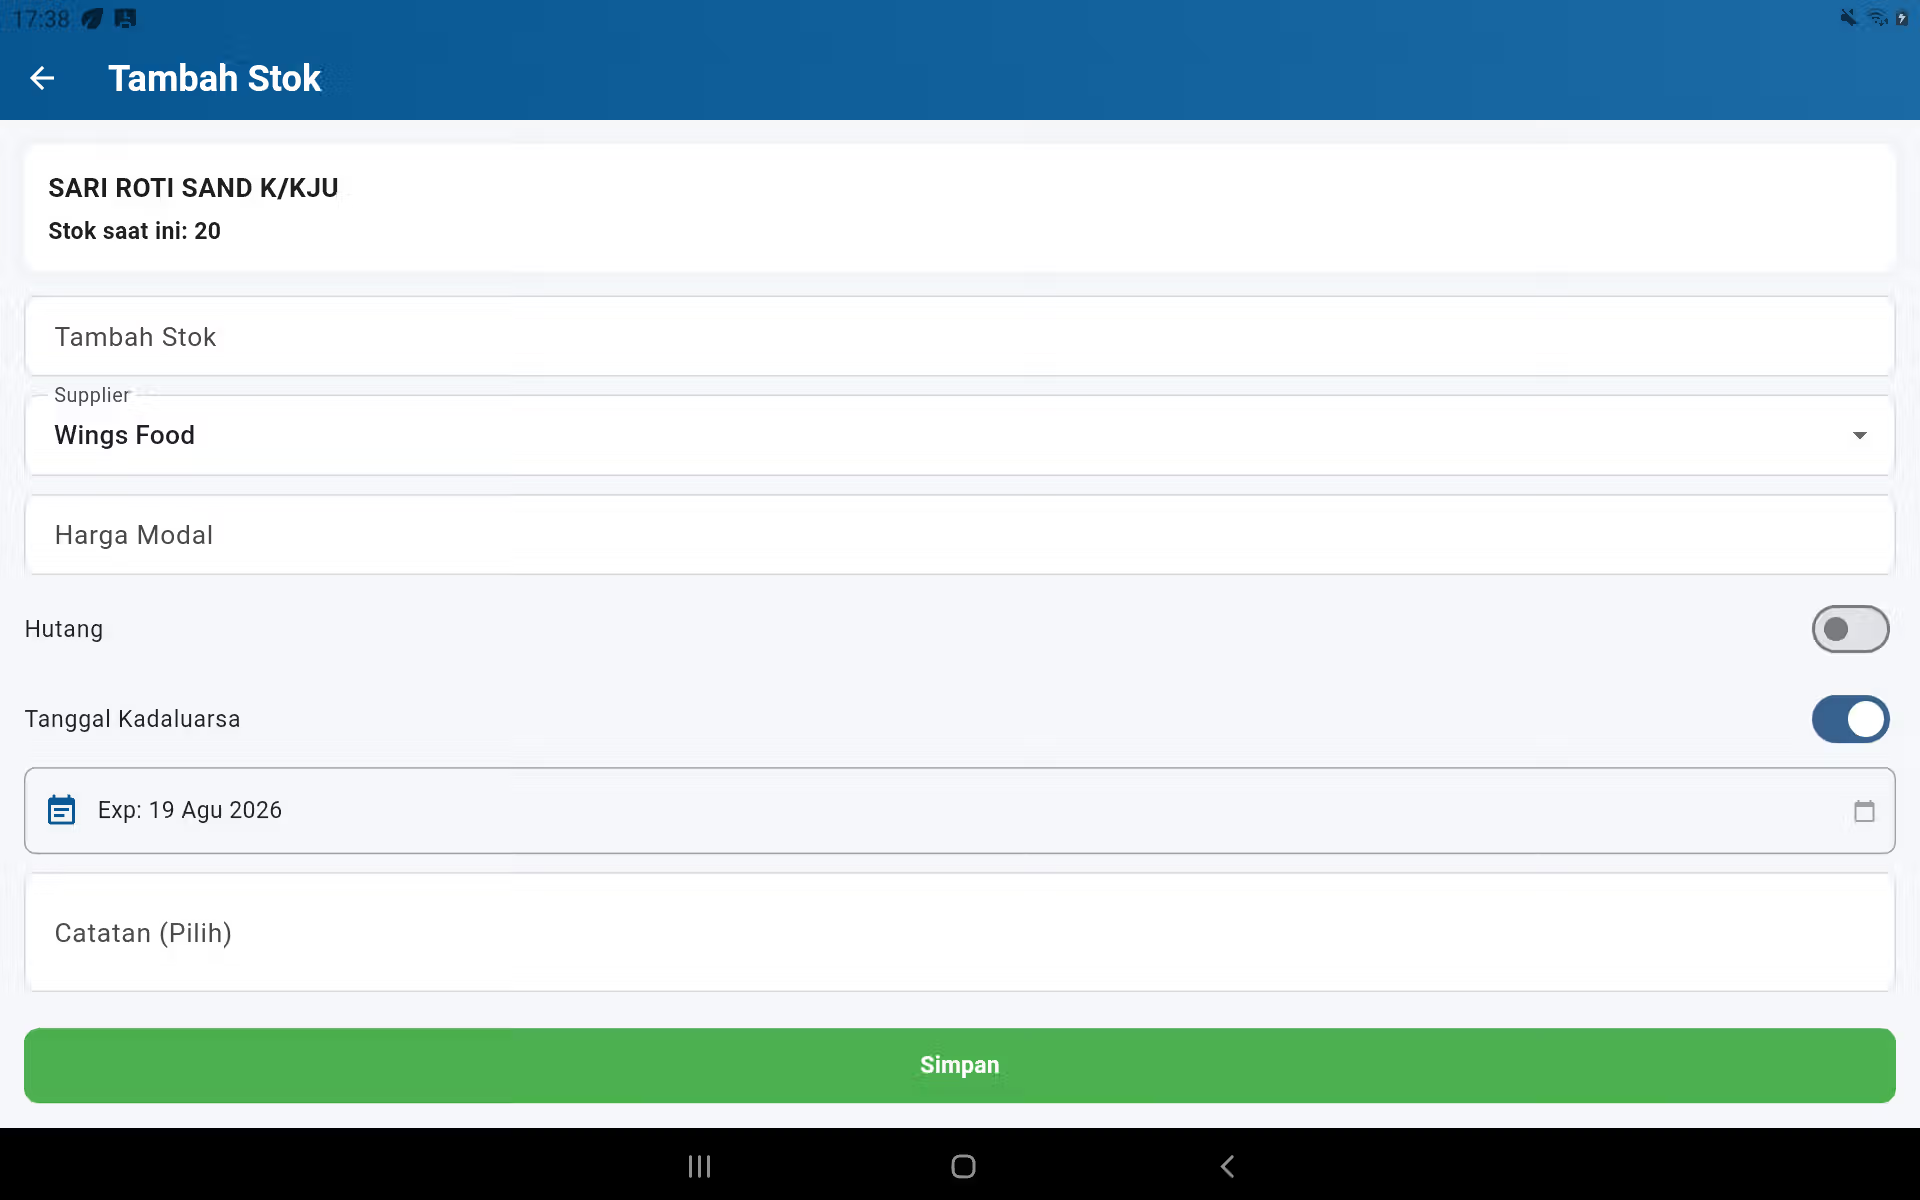
Add stock of the goods coming in
- Open it up. Main menu → Product and stock management → Products, find the items received.
- Press the button + / Add more stock on that thing. Make sure the product name and current stock match the physical item.
- Enter the correct number of items in the column Add more stock.
- Choose Supplier The one who sent the goods. If it doesn't already exist, get the supplier first.
- Put it in. Capital Prices according to invoice; this value is important for HPP/spider losses.
- Activate it Debt Only when the goods have not been paid. Complete the billing data according to the supplier's proof.
- For old storage, activate Date of release, select the expiration date on the packaging, fill in the batch/invoice note if necessary, and then press Keep it.
Reduction or correction of stock
Use the button. Reducing stock for damaged, lost, expired, or otherwise inferior stock. Fill in the auditable reasoning. Don't reduce stock by making a fictitious sales transaction and don't add stock just to make the numbers seem appropriate.
Supplier data and debt
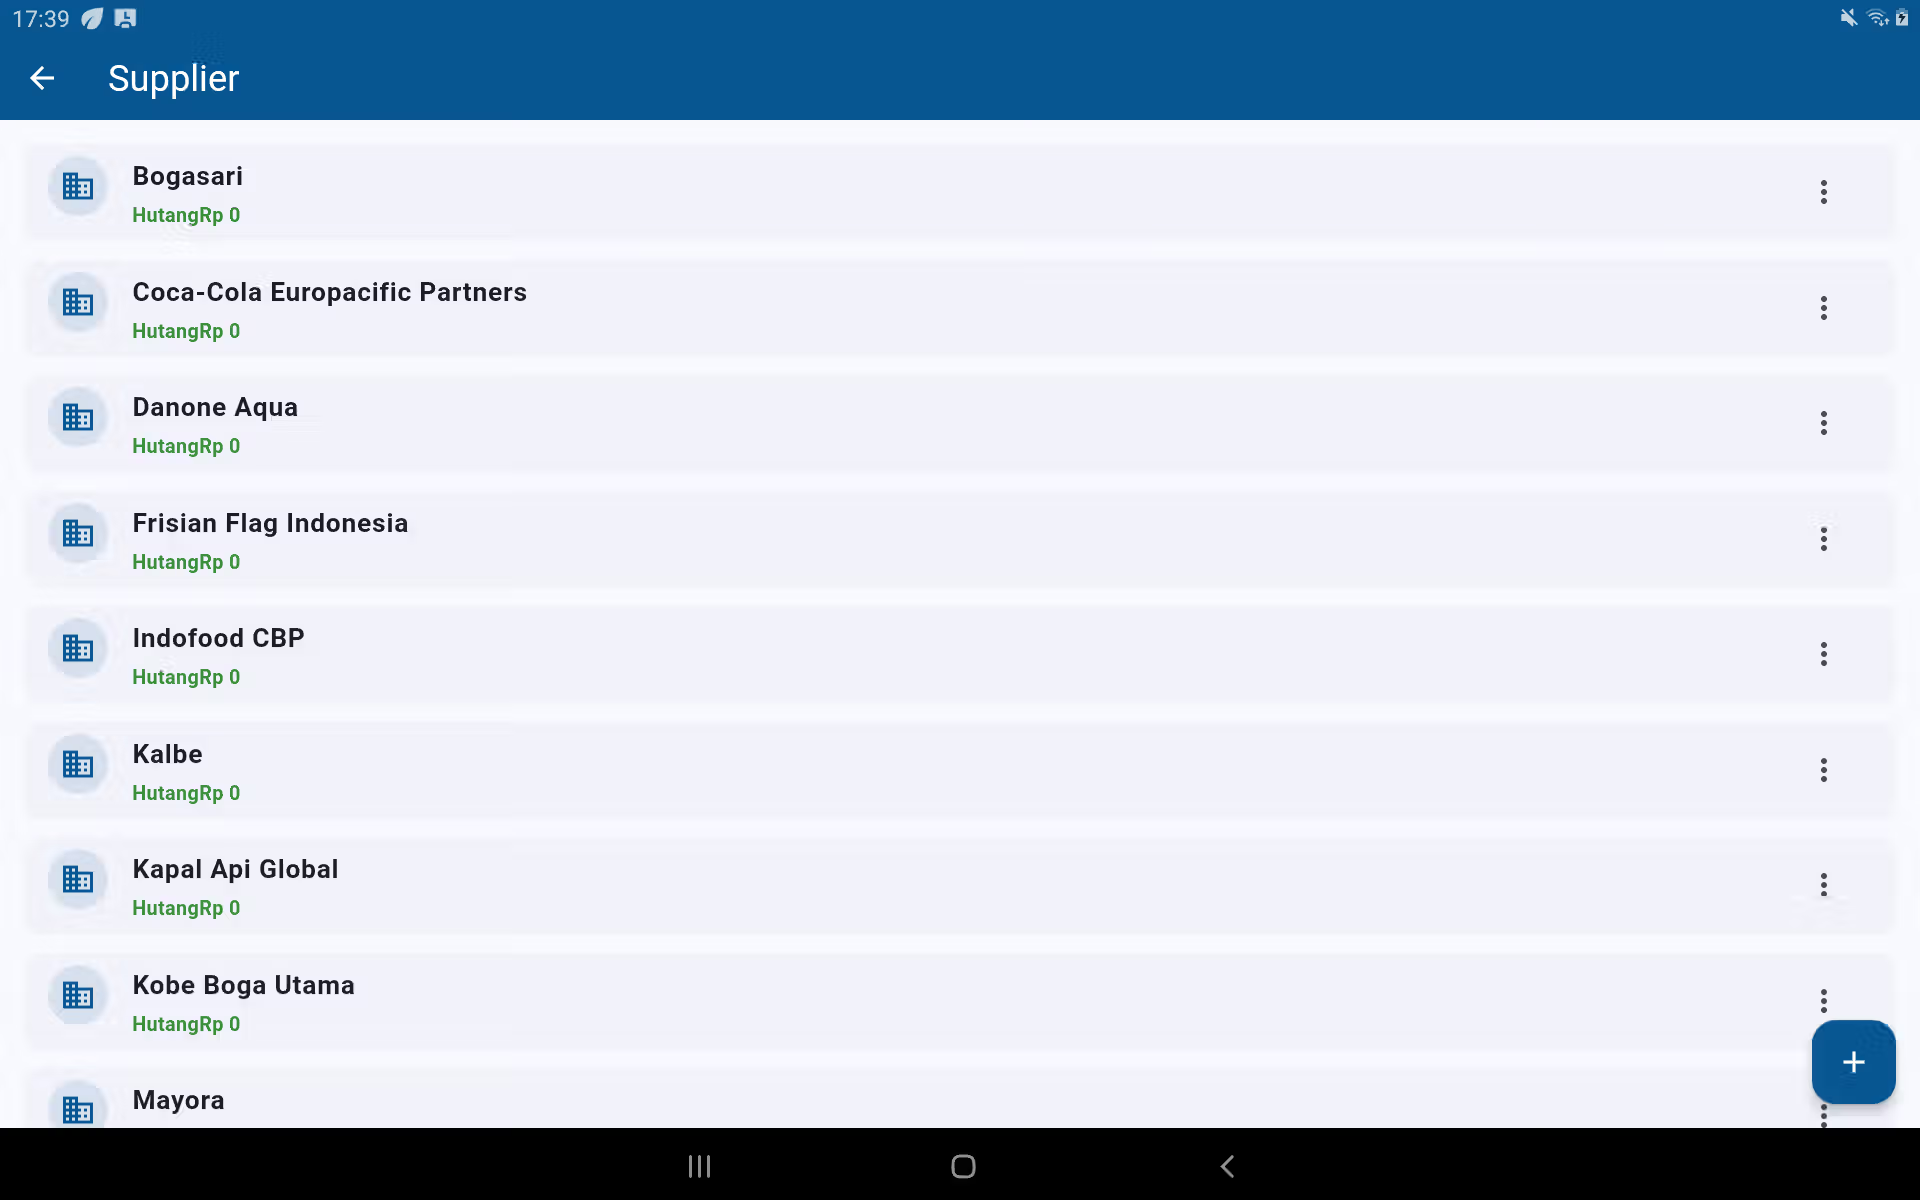
- Open it up. Product and stock management → Supplier.
- Add the name of the supplier, contact, address, and records required for the business.
- When the stock comes in, select the supplier from the Add-in-Stock form.
- If you buy credit, activate the Debt; when paid, record the repayment on the supplier's debt record, not by adding/reducing stock.
- Check the supplier's debt statements regularly and match them to the invoice.
Expiry / expiry date
- Use expiry only for products that do have expiration dates.
- When you receive the stock, put the date on the packaging for the next batch. If there is a batch with a different date, record the acceptance separately to keep the search correct.
- Check it out. Annual report periodically to find out if the item is approaching or past its date.
- The next step: apply. FIFO, give promotions as policy, pull out, or reduce stock for expiration reasons. Don't sell anything that's out of date.
03 The Loss
Membership, discount, and loyalty
From the main menu available Member management and Discount management. Register the member with the correct minimum data, then select the member at the pre-payment point to associate the transaction.
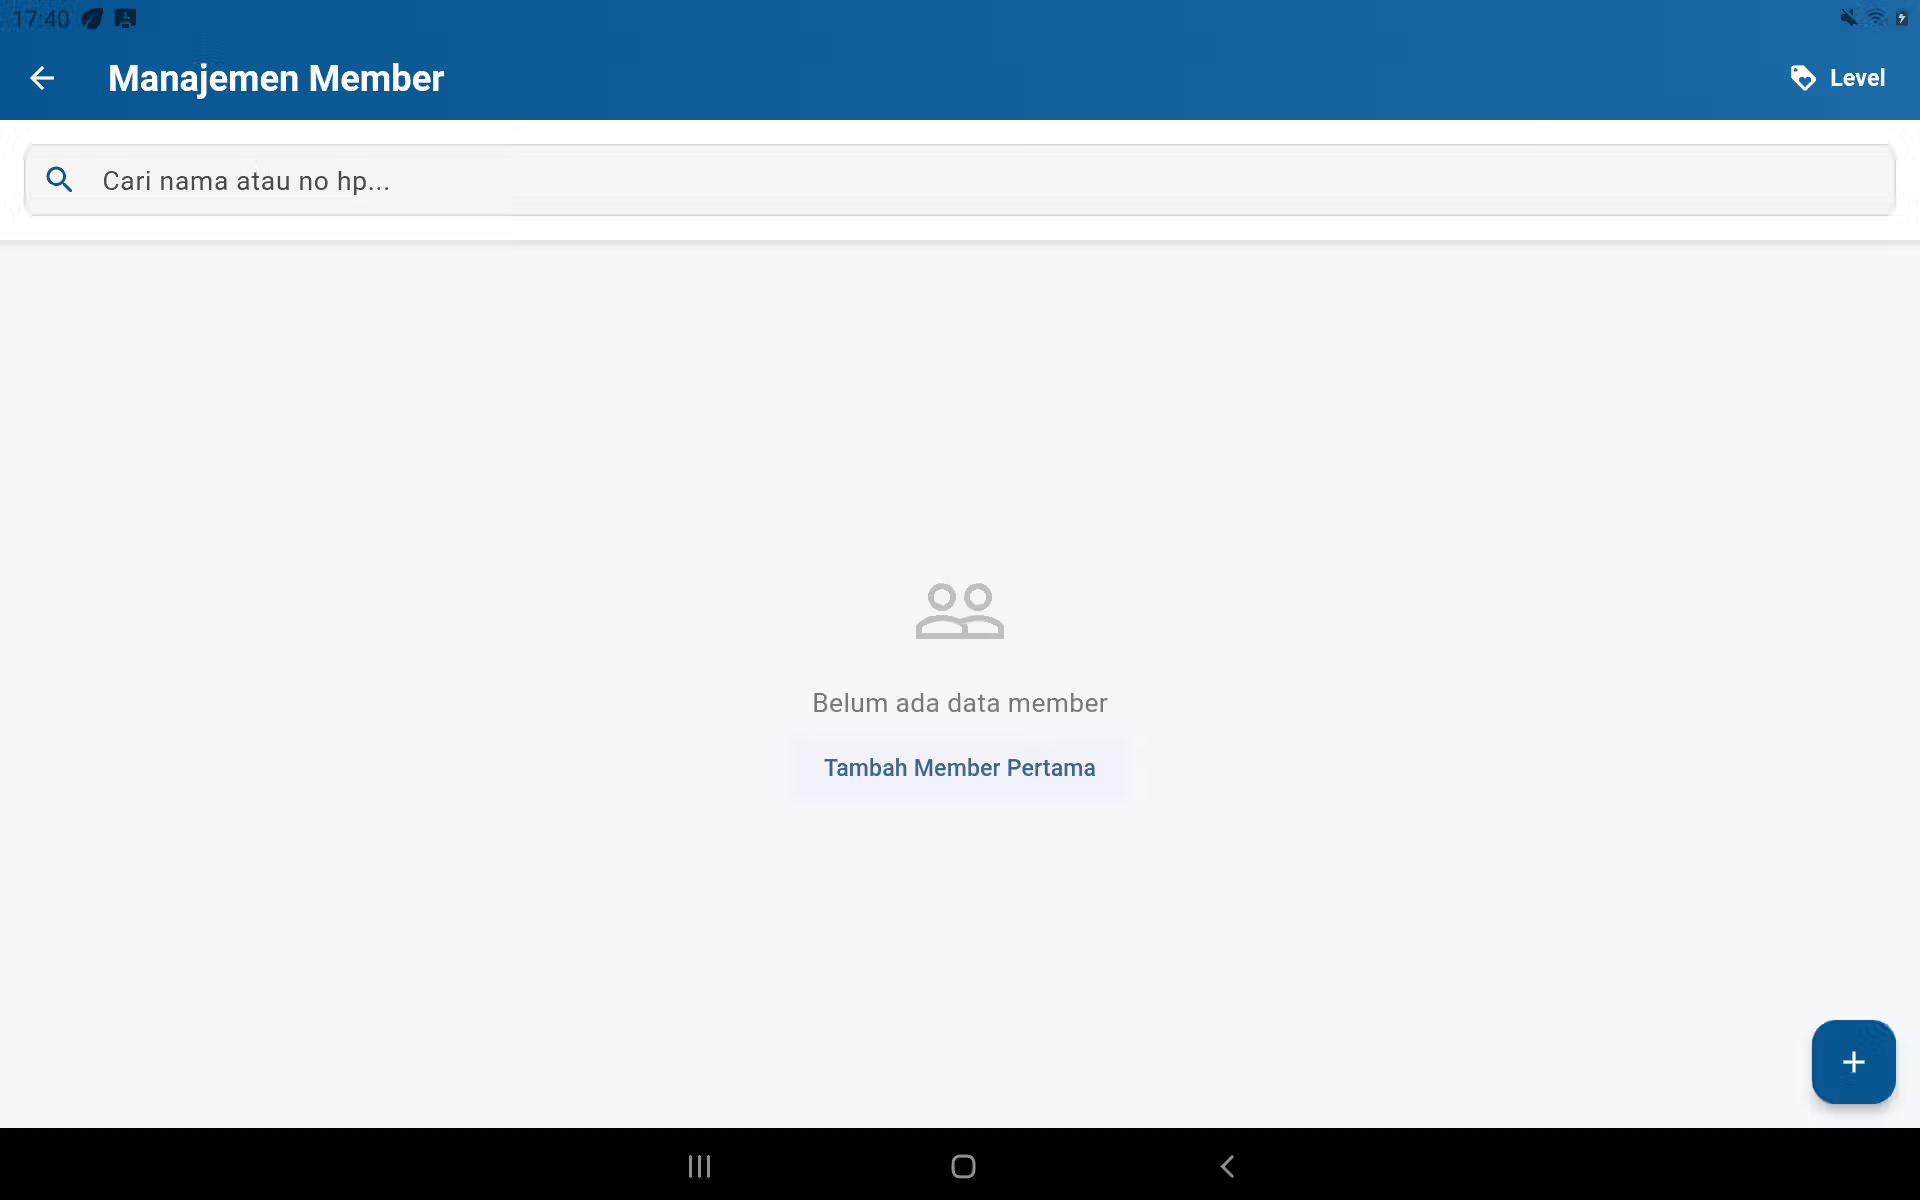
Member
Use it to store customer identity, view details and history, and support loyalty/level member programs when activated. Make sure the contact number is written consistent and not duplicate.
Discounted
Make discounts with easy-to-understand names, value types, active periods, and clear terms. Review the Discount Report to evaluate its impact on sales.
How to make and wear members
- Open it up. Main menu → Member management, and then press the addition member.
- Fill in the customer's name and contact details correctly; use one number for one profile so that the history is not broken.
- Adjust the member point only if the loyalty program already has written rules.
- At the POS press Select a Member, find the customer, then make sure the name appears correct before the transaction is paid.
- Use member history to track customer transactions; do not delete or merge data without checking the related transactions.
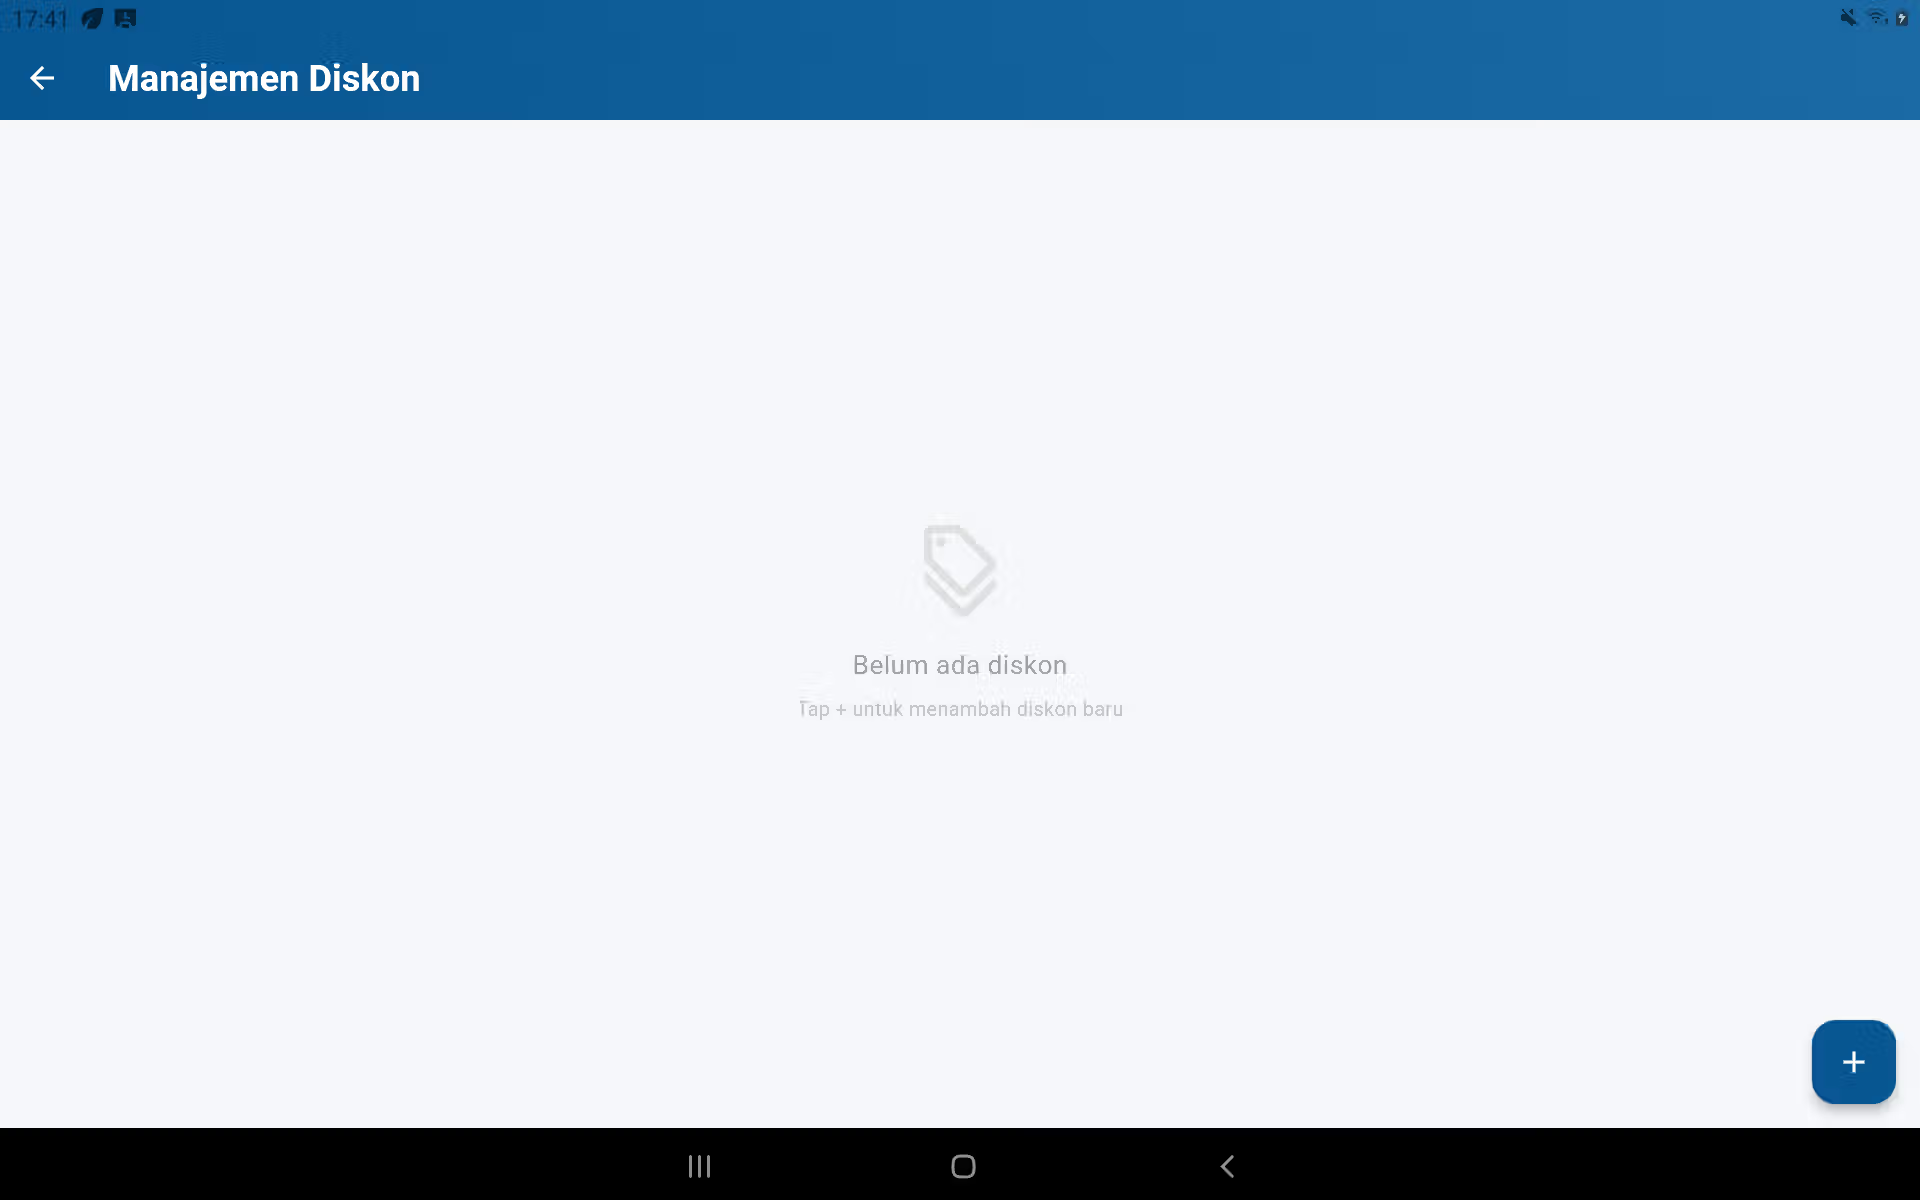
How to input and use discount
- Open it up. Main menu → Discount management, then make a new discount.
- Include promotional name, value type (percent or nominal), active period, and minimum terms when used.
- Save and test transactions at the POS.
- On the payment page press Use the discount., select the appropriate discount, then check the cut value before paying.
- Review the following Discounted reports After the operation to see the transaction and total cut.
Safe practice: limitation of the right to make or change discounts to the Admin/Manager. The cashier is just applying the approved promotions.
04 The Fate
Cash, expenses, debts, and commissions
The menu Finance and The safe used for daily operational discipline: recording of cash flow, business expenses, cash opening/closing, and mutation review.
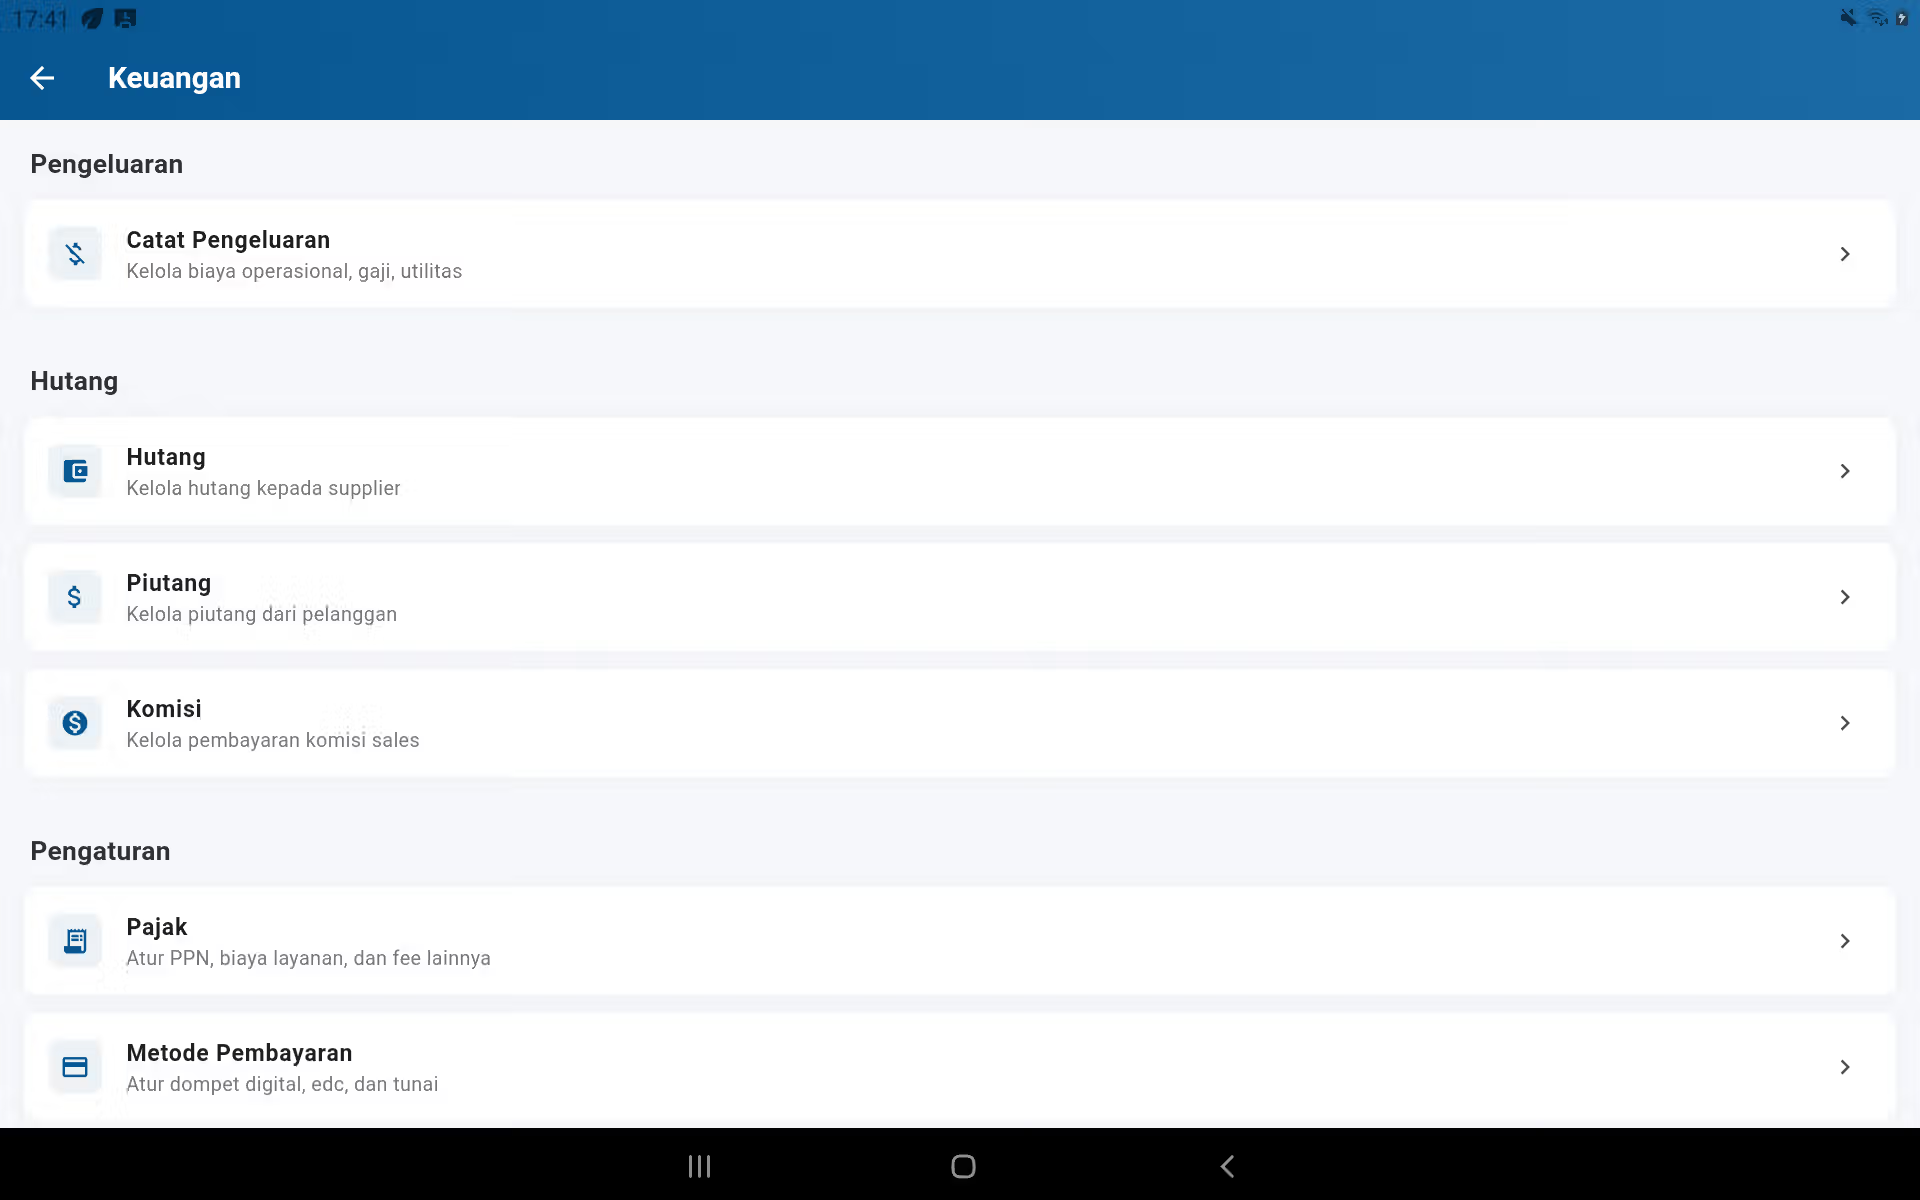
Cash drawer & shift
Take the early cash when you open the shift. Enter the expenses or cash receipts as evidenced. When you close the shift, calculate the physical money and compare it to the value of the system; investigate the difference before the next shift.
Cost of the effort
Record operational expenses with clear categories, dates, denominations, and details. The unrecorded costs will make the profits too high.
Customer debt
Payment Transaction. You're going to need a customer that can be charged. Record the payout through the debt menu, don't make new sales transactions to receive debt repayment.
Commission
Set up the commission and associated staff scheme first. Check the Commission's Report before making a commission payment to ensure that no transaction is delayed or double-counted.
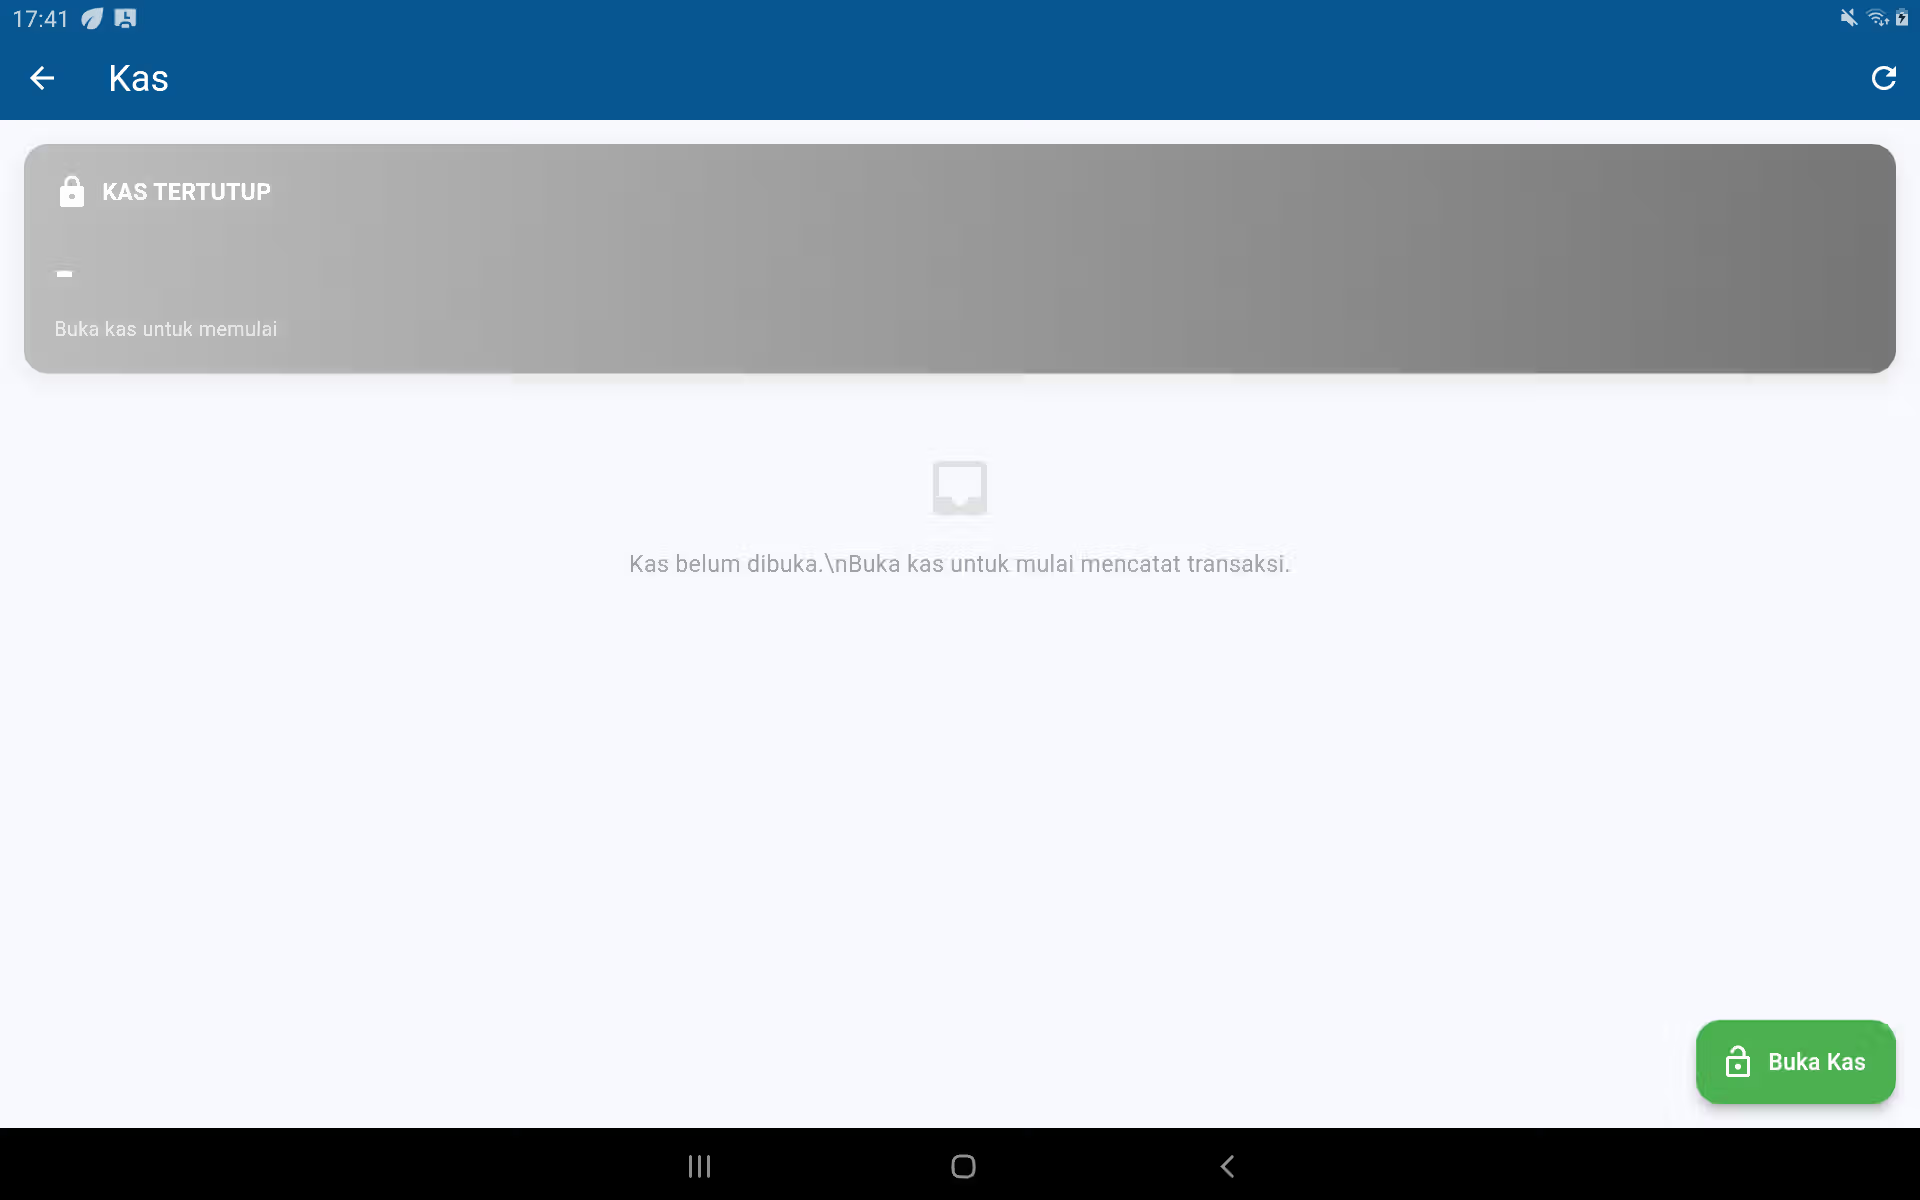
Open and close the drawer
- At the beginning of the opening shift The safe, press the Open the safe., then write down the initial capital according to the physical cash available.
- During shift cash and expenses records with nominal, category, and clear evidence.
- At the end of the physical cash counting shift, open the cash summary, and then match the cash sales, initial capital, cash in and cash out.
- Write down the reasons for the difference before closing the cash. Don't close the shift without counting the physical.
Customer debt: how to record and pay
- At the POS, pick the right customer/member.
- Enter the product and total check, then on the payment select Pay later Only after the customer and the bill value are confirmed.
- Open the Debt Management menu to see the balance per customer and the due date.
- When the customer pays, open the debt record and record the payment with the correct payment method.
- Check the Debt Reports; do not make new sales transactions to record the repayment.
Supplier and purchase debts
Get the supplier in first. When purchases are made on credit, record the bills on the supplier debt/purchase module with dates, denominations, and statements. When paid, record the payments on the same debt so that the debt balance and supplier's report are reduced. Keep the invoice proof as a reference.
Taxes and service fees
The administrator sets the tax rate and service charges on the arrangement/product in accordance with the business policy. Before you activate, make a test transaction and make sure the value appears on the total payout. Use the Tax Report and the Service Fee Report for recap; do not consider total sales as total taxes.
Commission
Open Finance → Commission to set up and pay staff/sales commission according to transactions that meet business rules. Before paying, match the Commission's Report with the period, staff, successful transactions, and void/return transactions so that the commission is not paid twice.
The following is the list of the countries of the European Union:
Staff, absences, rent, and reservations
User and access rights
The admin opens Configuration → User management to create a checking account, sales, and manager. Set the minimum roles and permissions required. Disable accounts of staff that are no longer working; do not share one account with many people because the report per staff becomes inaccurate.
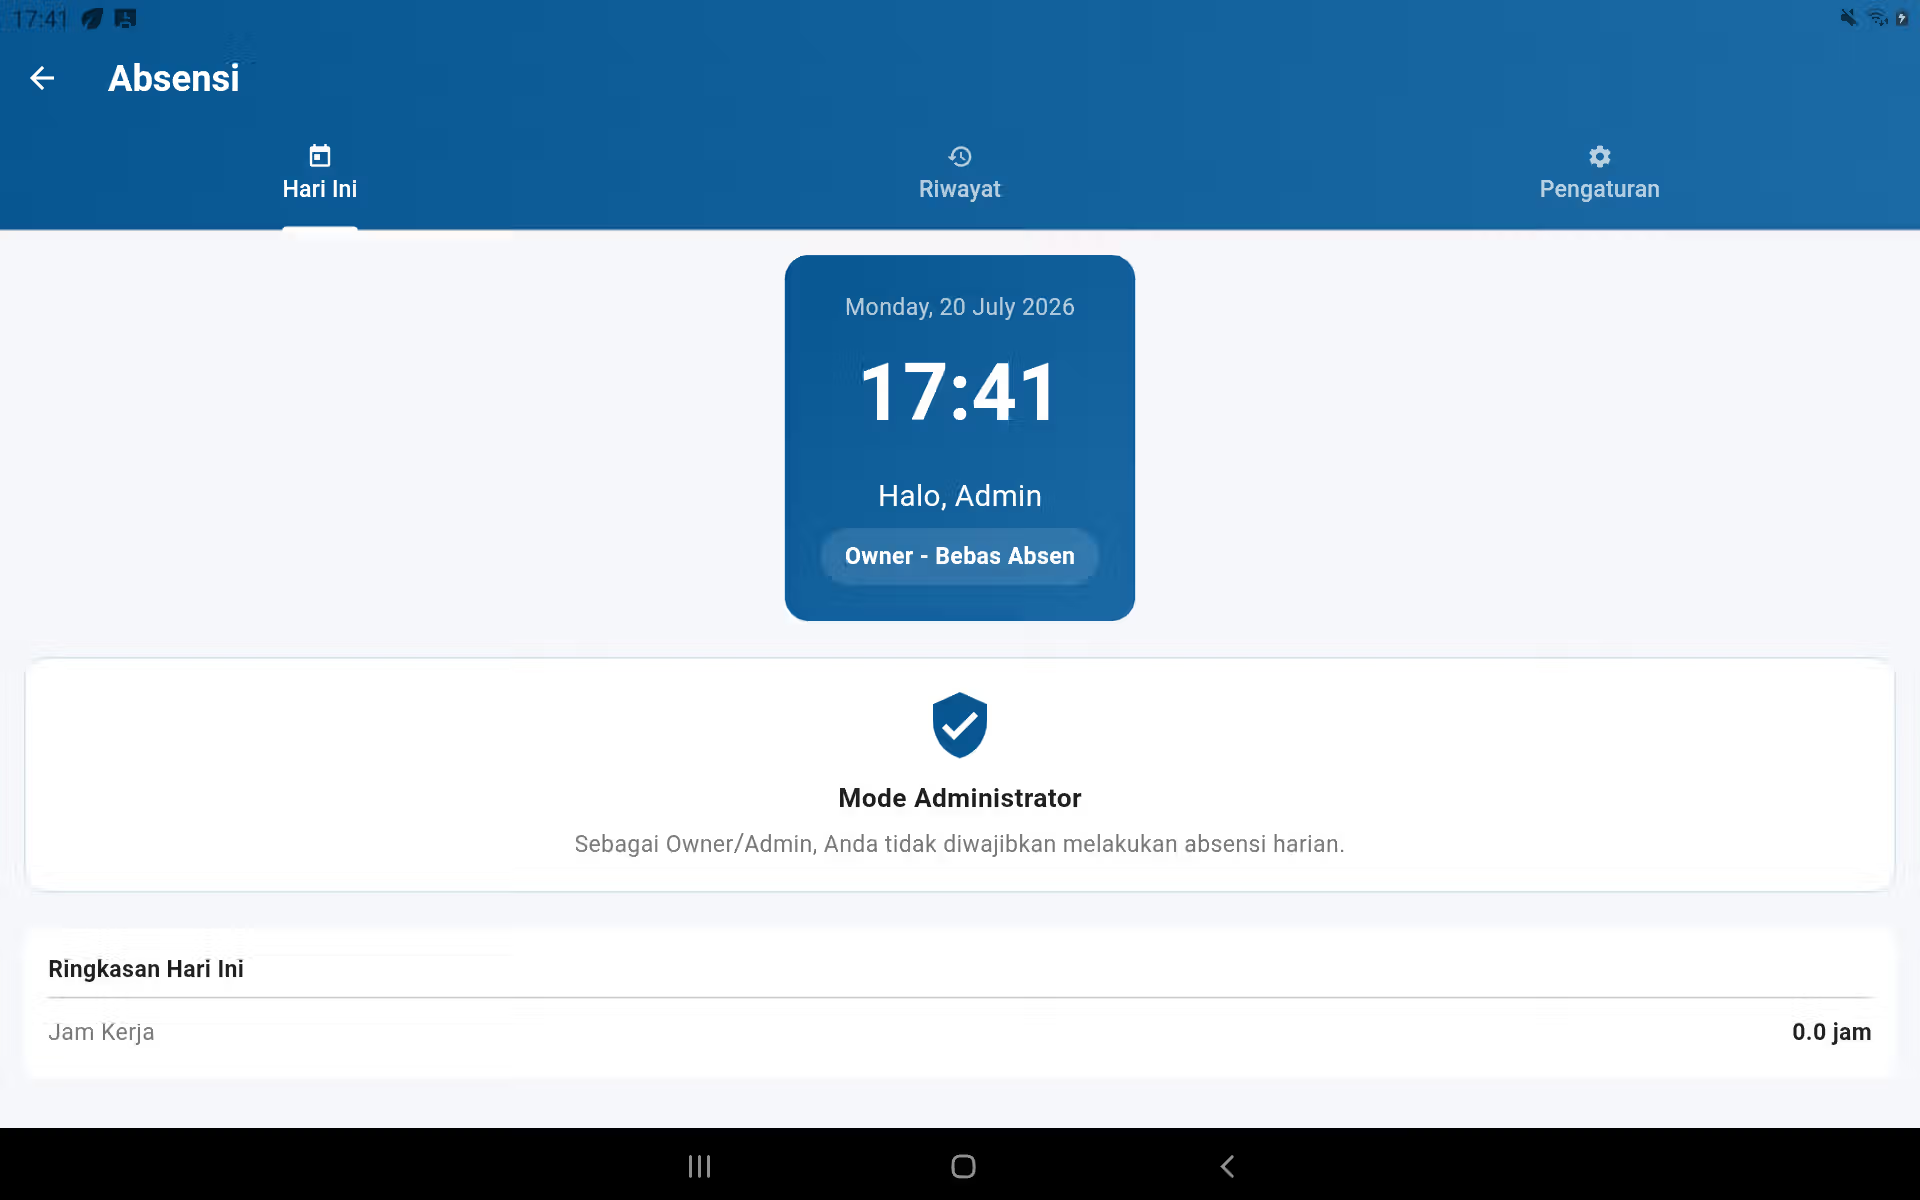
Absence and performance of staff
- Staff log in with their own account and then open it. Main menu → Absence.
- Clock-in/clock-out according to the button and shift policy. Don't use other staff accounts.
- The administrator/manager opens the History tab to check attendance and hours of work.
- Use Staff Absence Reports, Staff Transactions, Staff Cash, and Staff Performance to evaluate the period and ensure the staff filters are correct.
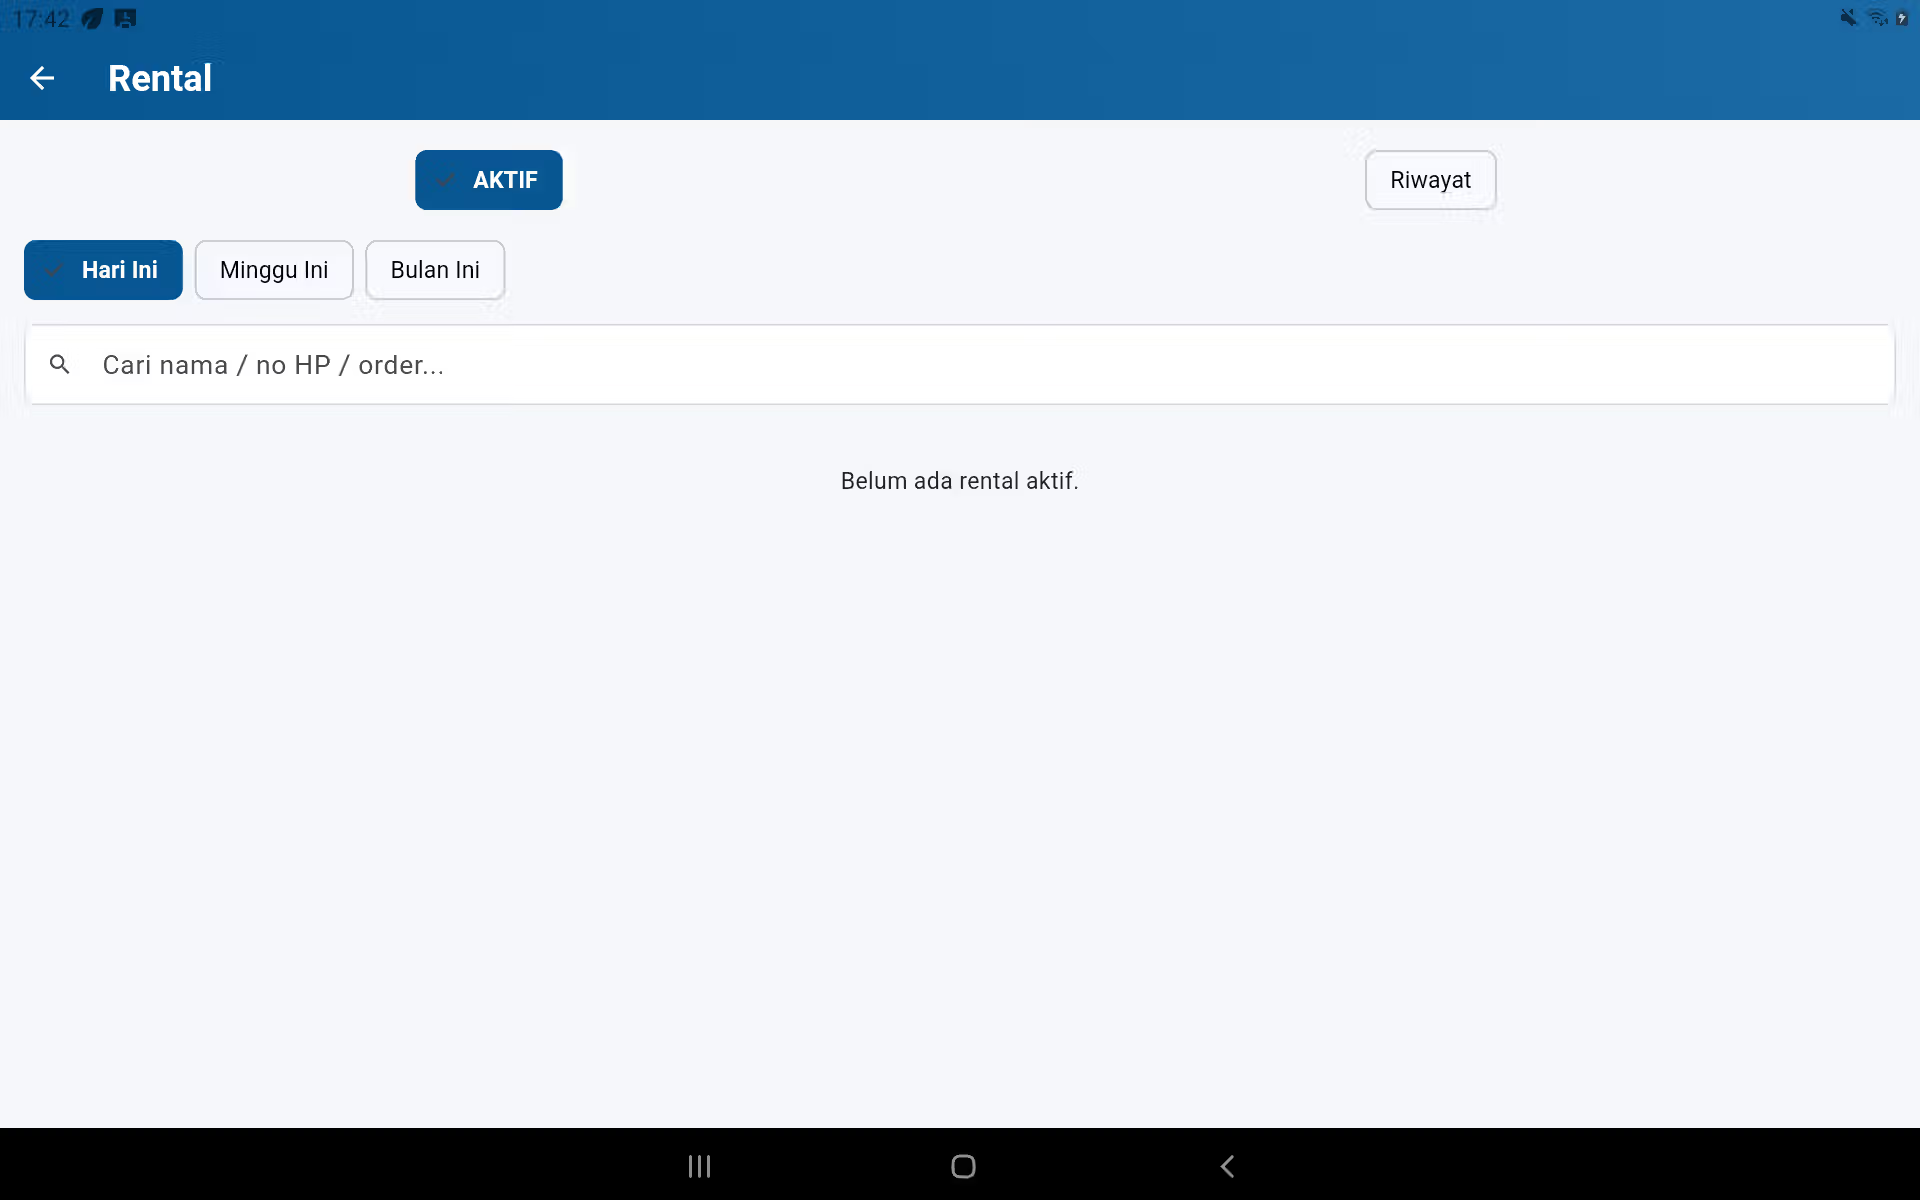
Rental and reservation (when modules are activated)
- Make items with type Rental First of all.
- From the POS select rental items and customers; fill in the date/duration, price, advance or payment according to the available trail.
- Open it up. Active rental To see all the unfinished rents.
- When the goods are returned or the service is completed, open the rental record and update the status/completing the transaction. Write down the condition of the goods and the remainder of the bill if any.
- Use the rental history for the audit. Don't delete the rental records to cover the return issue.
The following is a list of the topics covered:
Report: read the numbers, make the decision
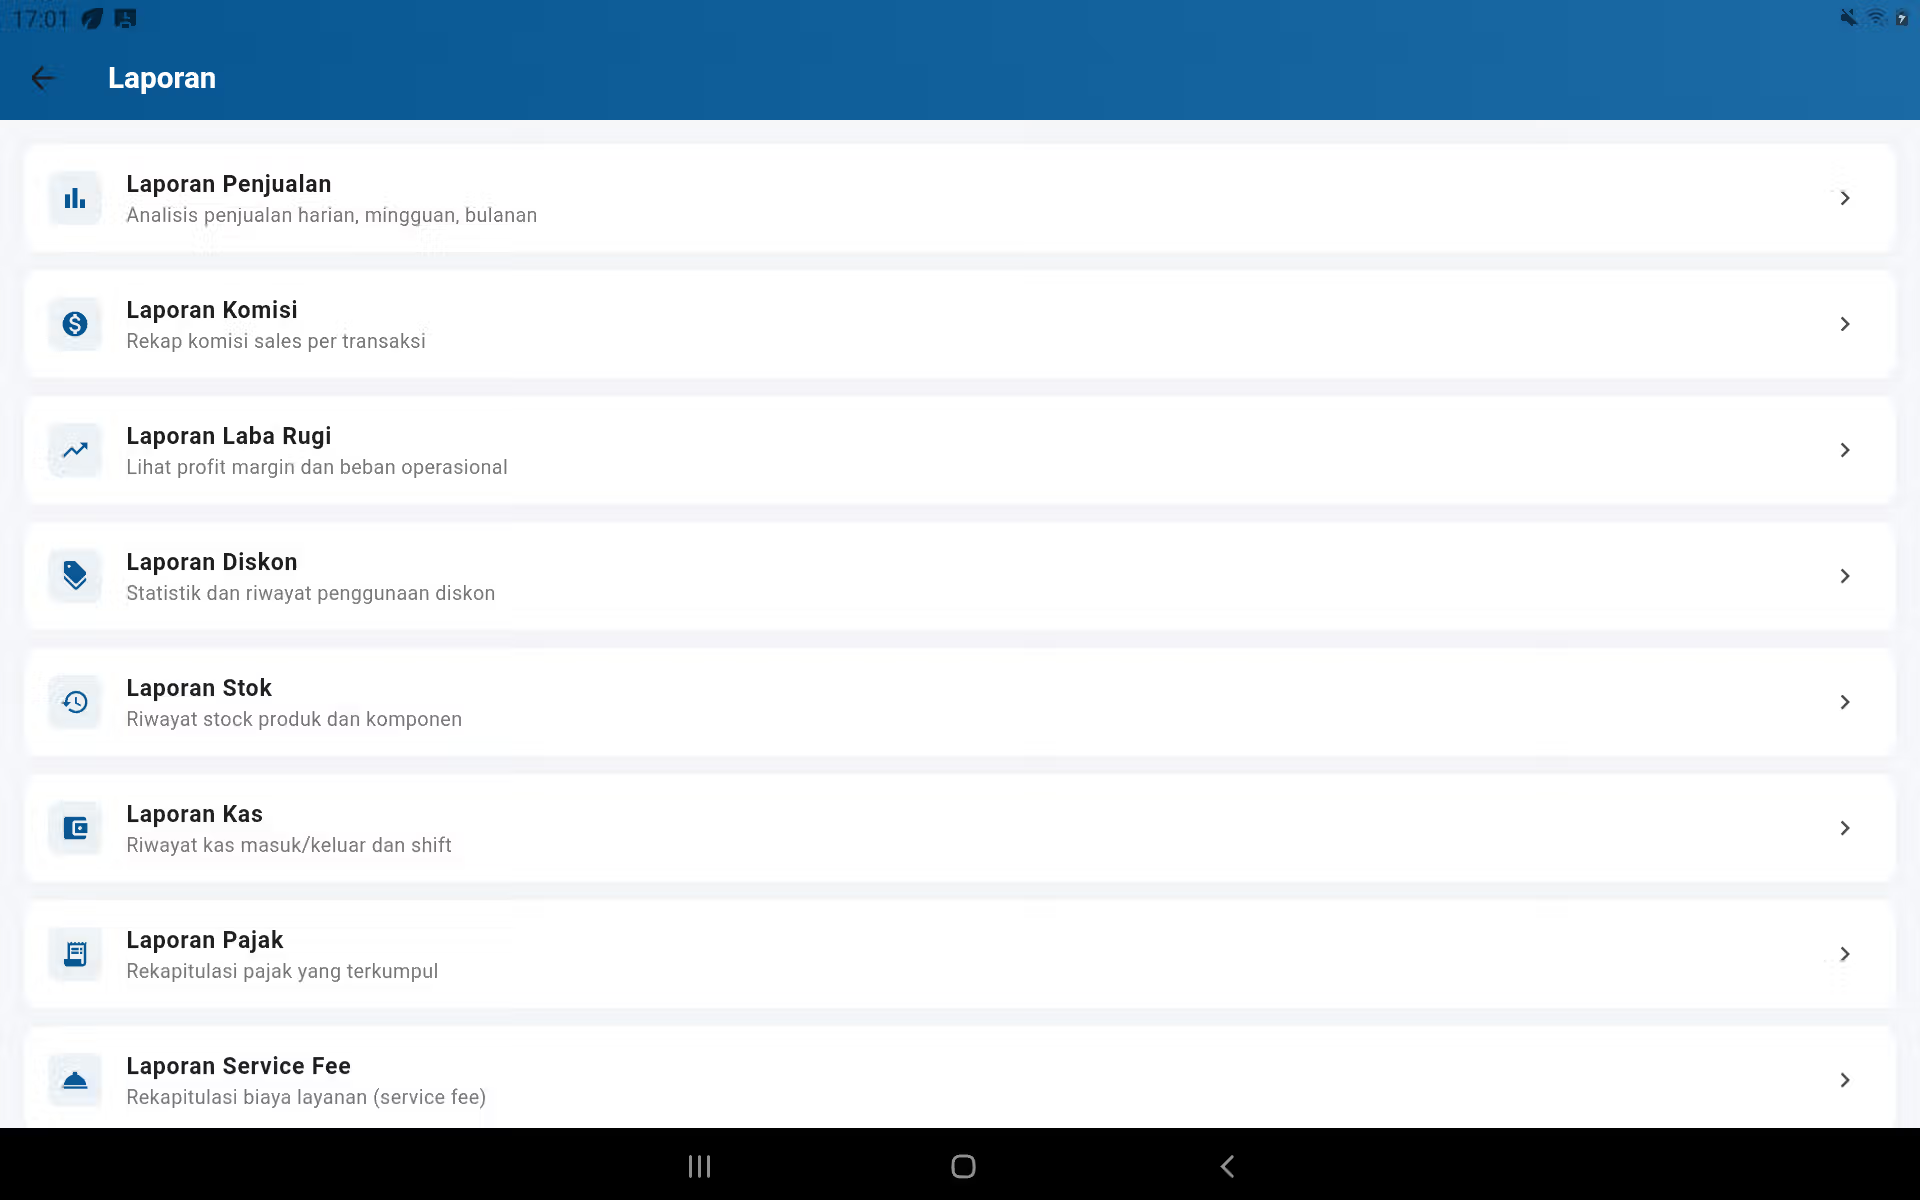
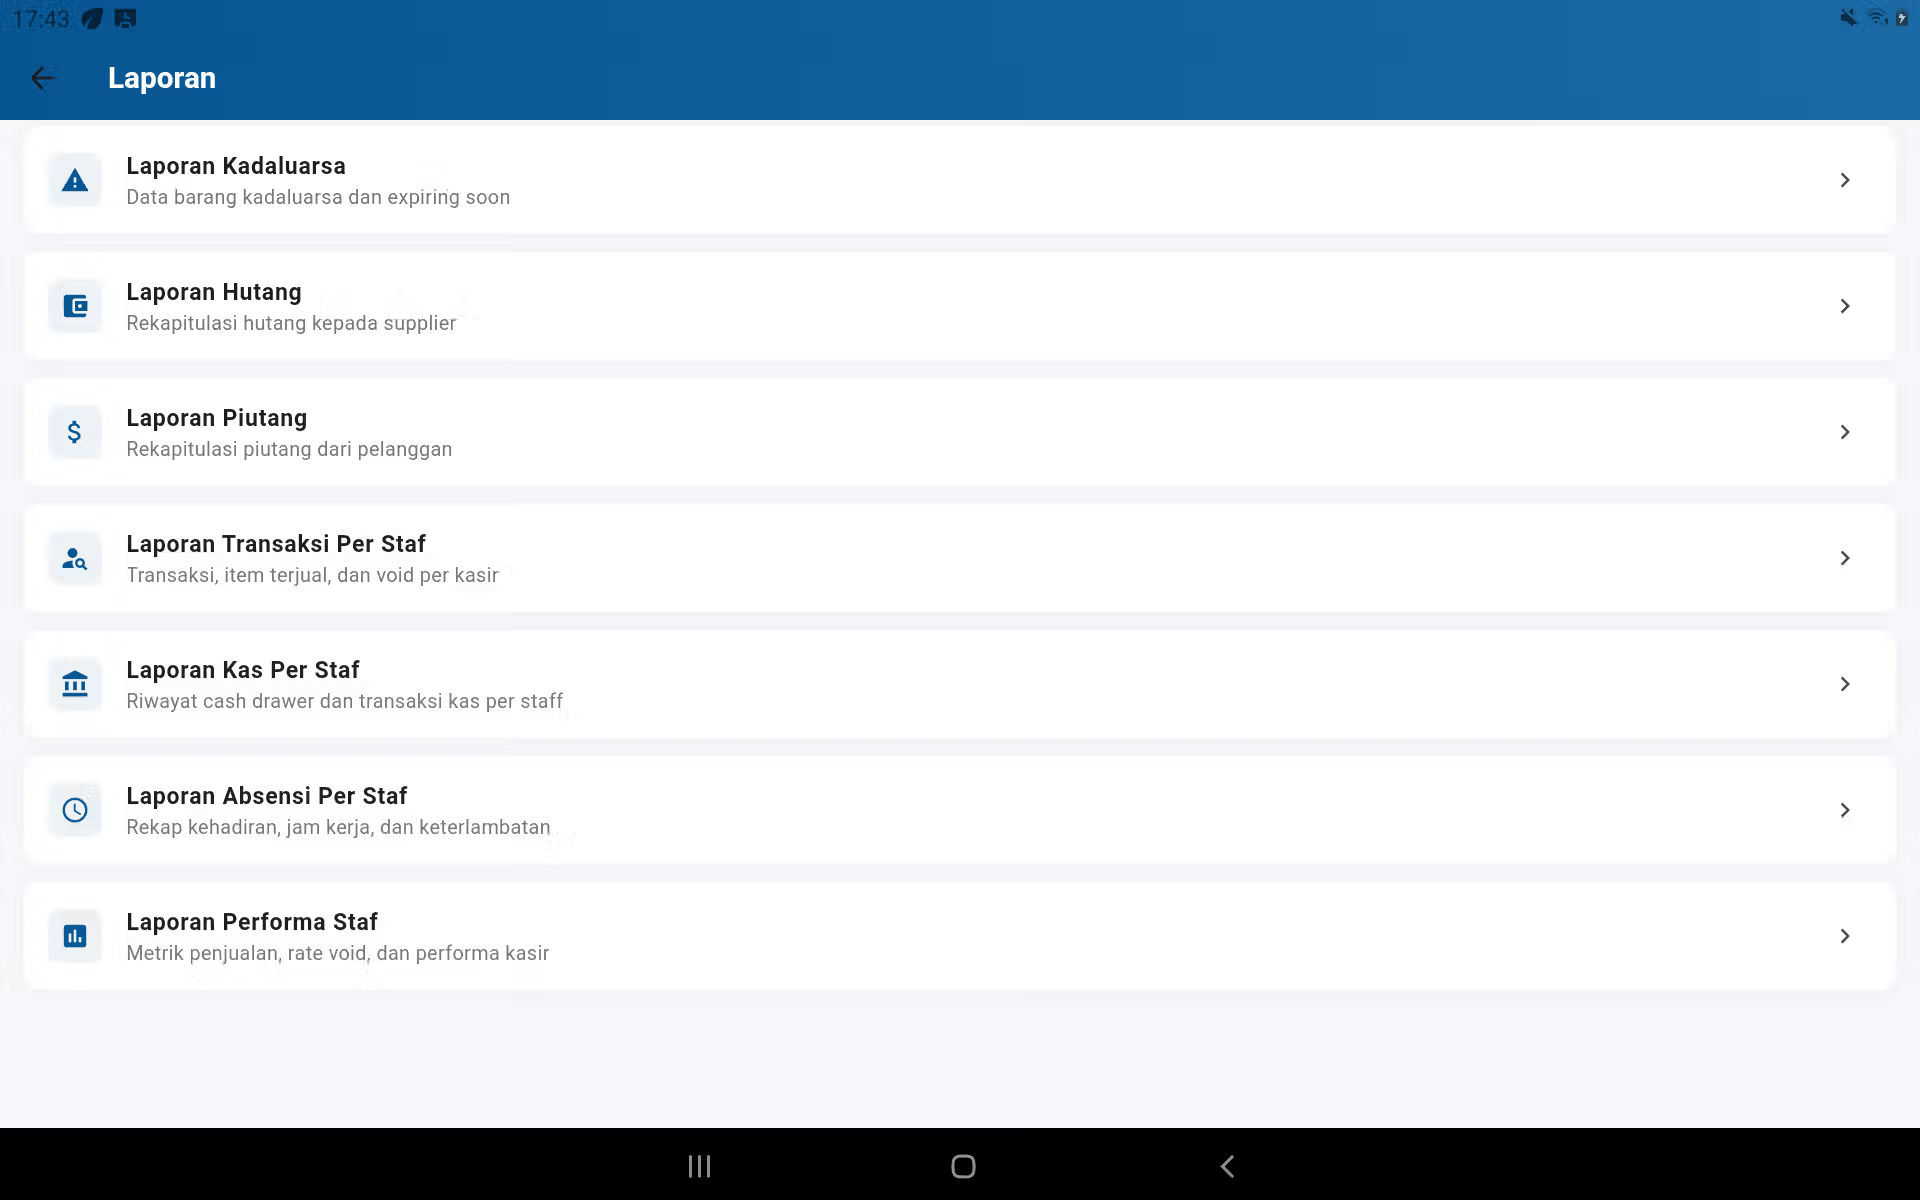
Get in from Main menu → Report. Always check the period, transaction status, branch/device (if relevant), and staff filters before exporting or comparing numbers.
How to open and read reports
- Open it up. Main menu → Report, then select the type of report to check.
- Choose a period: Today, This Week, This Month, or a specific date range.
- Use available filters such as payment methods, status, categories, or staff. Choose All of them. For the whole crew.
- Read the full summary first, then open the detailed list to track the transaction/product/staff causing the numbers.
- Exports only after the period and filters are re-examined. Name the file with the report period.
Sales and Product Report
Use for turnover, number of transactions, items sold, products sold, payment methods, and evaluation of sales hours/periods.
Stock and expiry reports
Use it to check for remaining stock, stock movements, corrections to opname, components, and items that must be promptly dealt with as expired.
Cash, Tax and Service Fee reports
Use when reconciling shifts: compare physical cash, cash in/out, taxes, and service charges with the source transaction.
Debt, liabilities and commission reports
Use it to charge customers, pay suppliers, and calculate staff commissions based on valid transactions.
Profit and Loss Report
Use it to look at revenue, capital/HPP, discounts, and operating expenses. Make sure the capital cost and costs are put in order to make the results meaningful.
Reports per staff
Use it for sales, transactions, cash, absences, and user performance. Make sure the cashier always logs in using their account.
13 Administration
13. Business organization
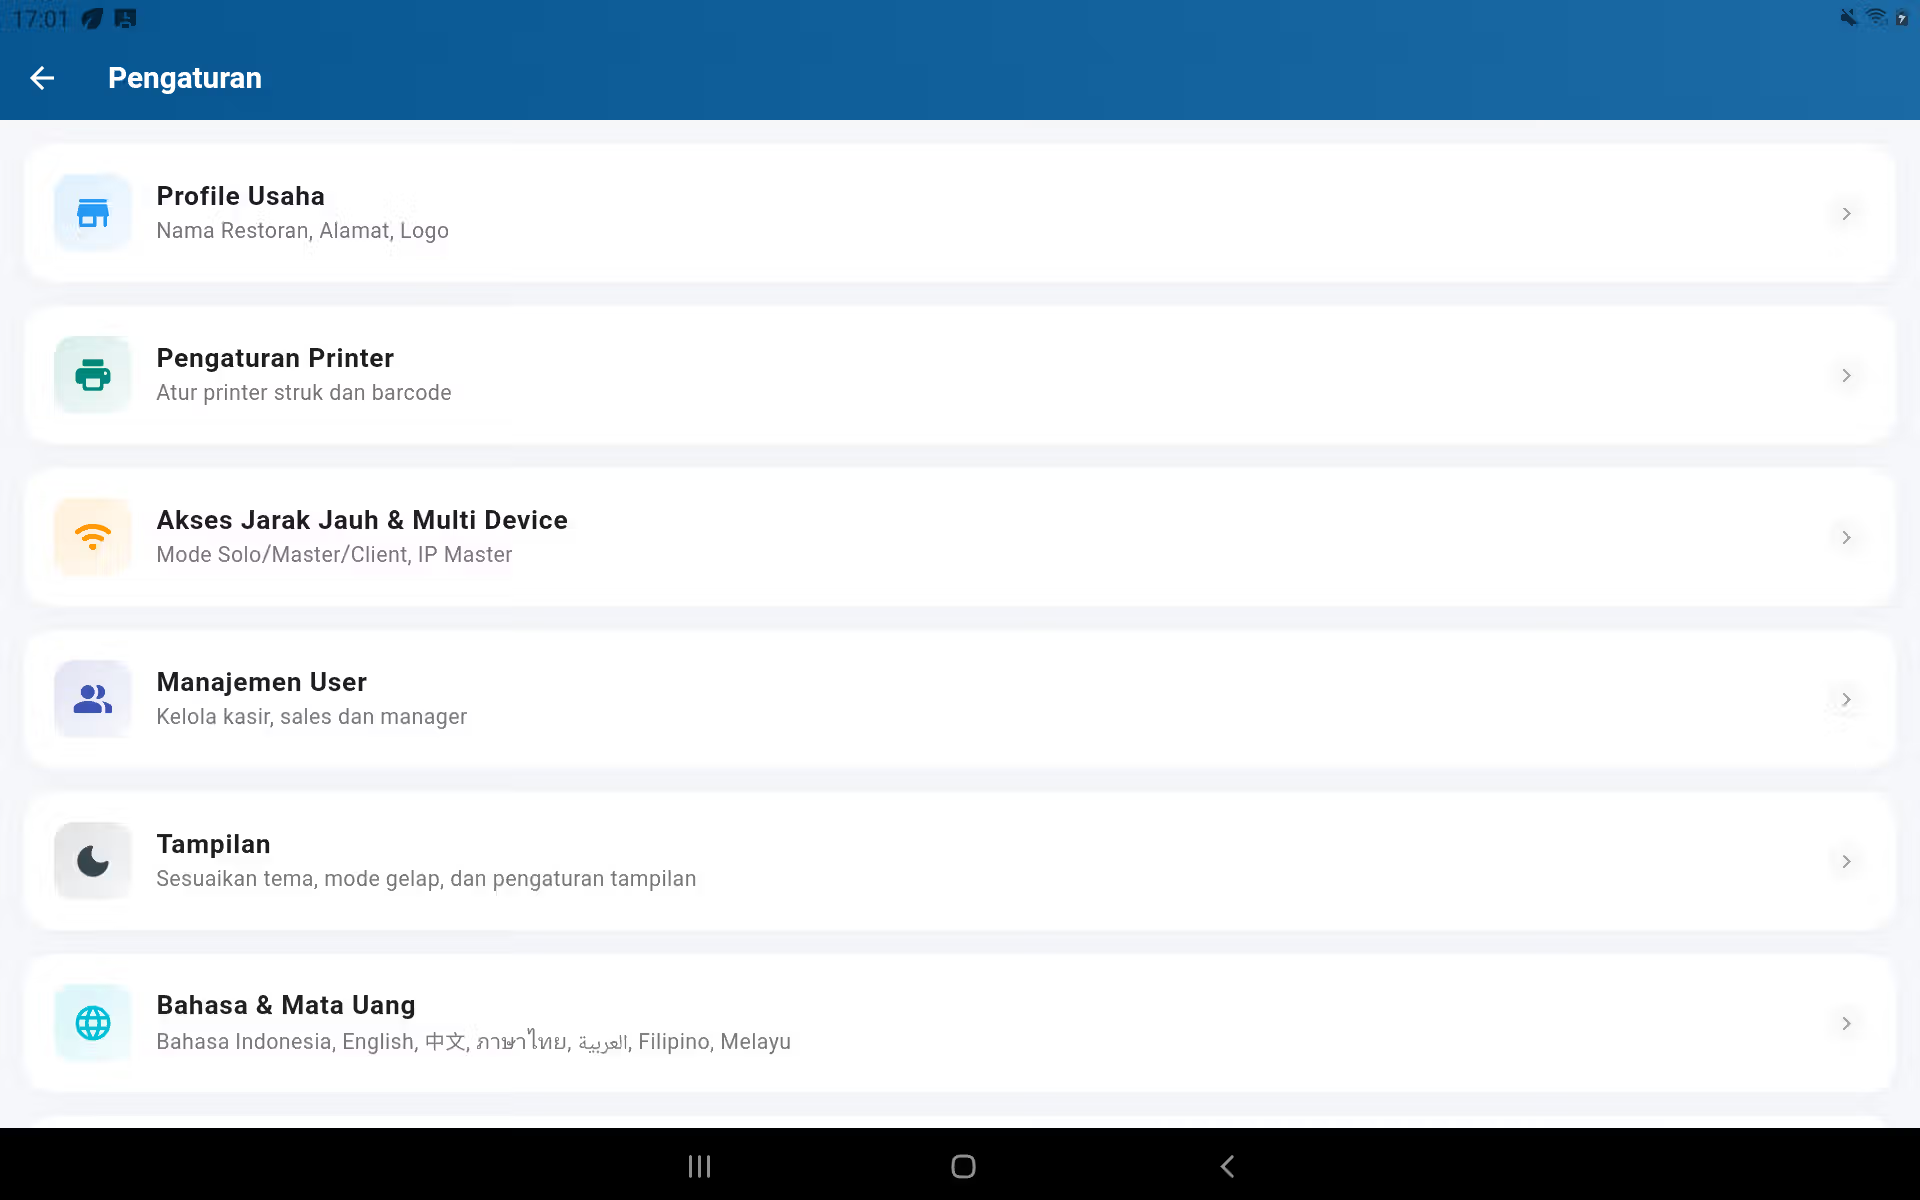
Business profile
Fill in the business name, address, contact, and logo. This data can appear on the stack and related documents.
Structural and barcode printers
Select a printer, connect it according to the available methods, test print, and then make sure the paper is the correct width and texture. Re-test after you change the printer.
Remote and multi-device access
Choose Solo, Master, or Client modes according to the enterprise architecture. For Master/Client mode, make sure the network is stable and the IP of the Master is correct before activating any other cash register.
Language, currency & appearance
Adjust the language, currency format, theme, dark mode, and display preferences according to the device user.
The payment gate
Gateway configuration is only with legitimate business credentials. Make a small nominal test transaction before it's operational.
Taxes, service fees & methods of payment
Activate only the components that are actually applied by the enterprise. Check the impact on total bills and reports before starting shift.
Checklist to go live
12. Stak printers, barcodes, and drawers
Main menu → Setup → Setup of the printer
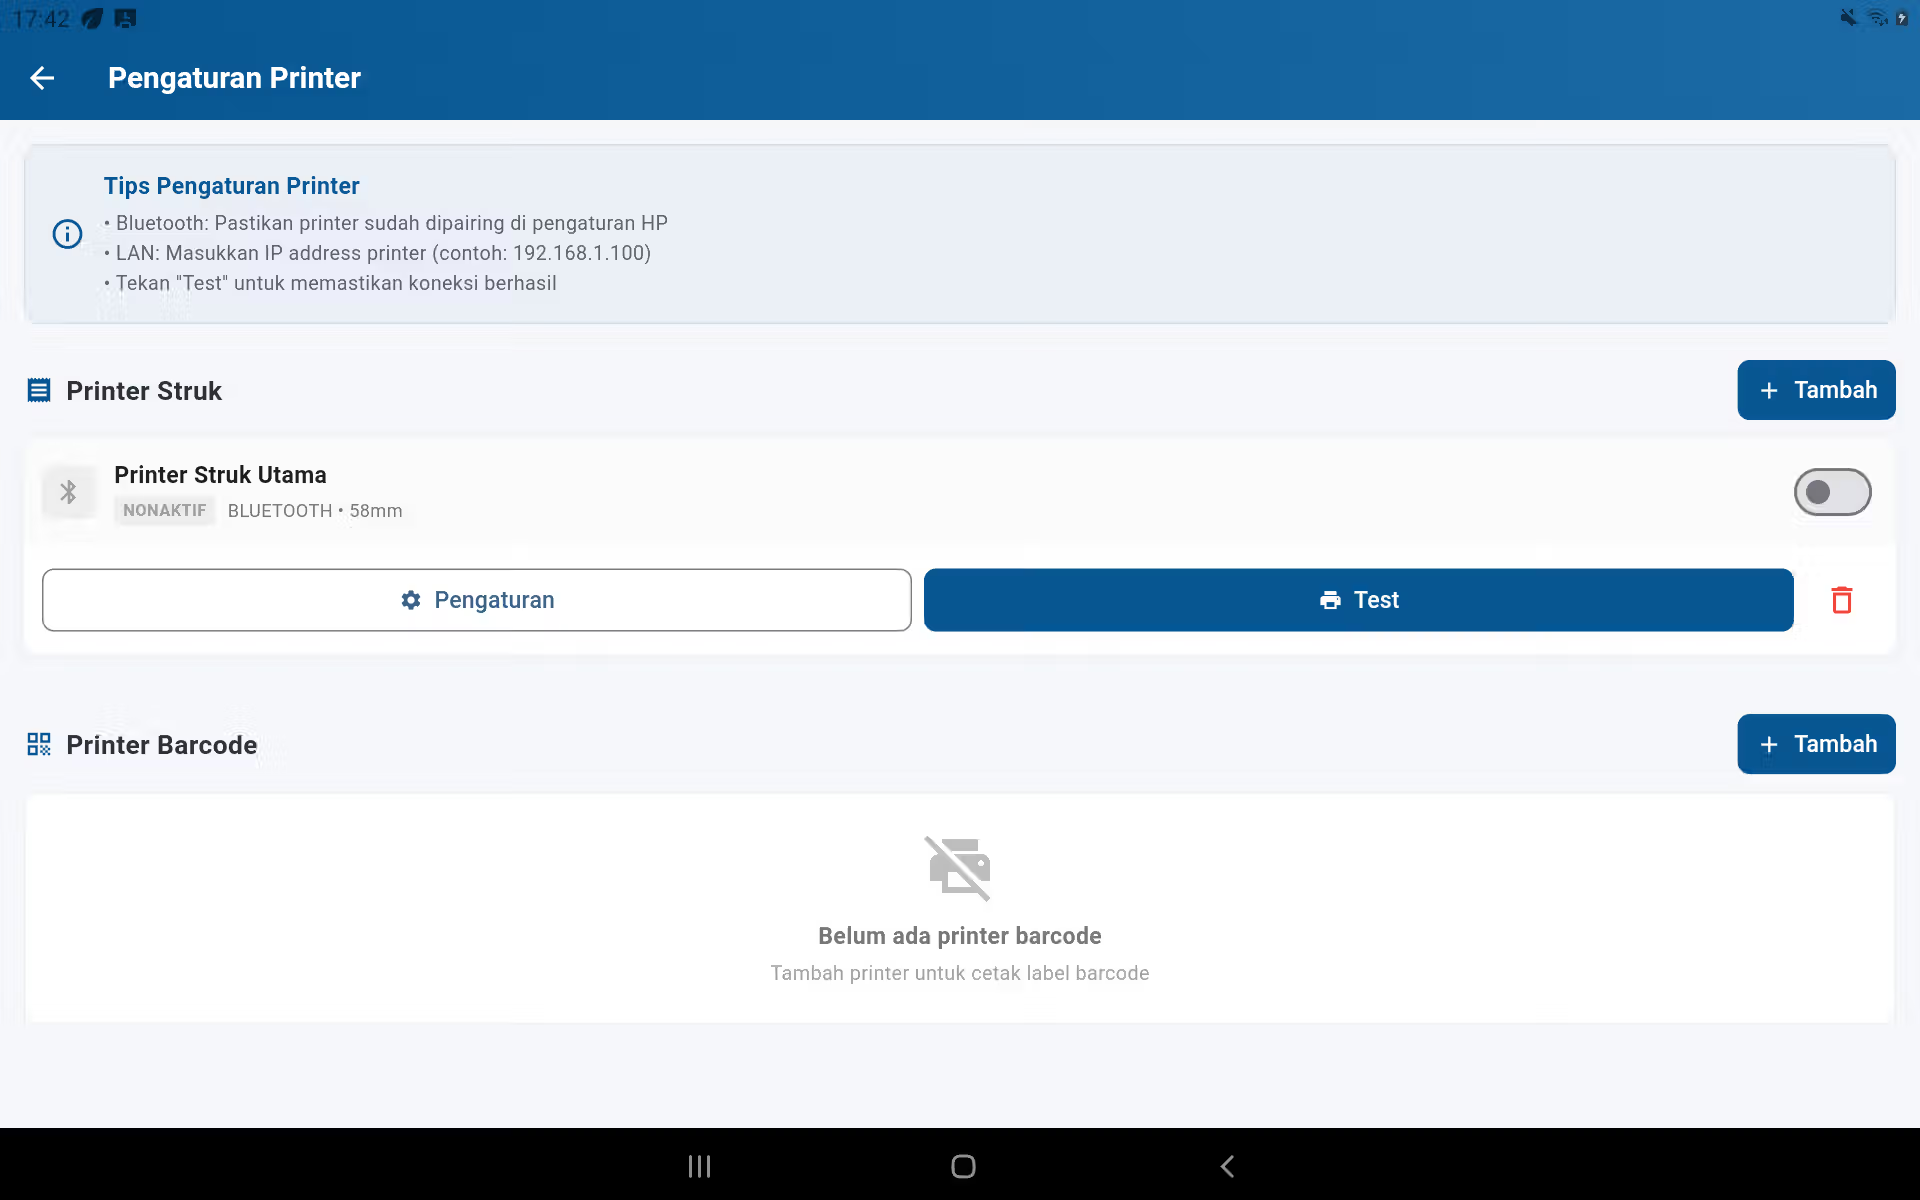
- Turn on the printer and paste the paper according to the size used (e.g. 58 or 80 mm).
- Turn on Bluetooth or make sure the network printer is on the right network.
- Open the Printer Settings, select the device, save it, and then do it. test print.
- Check the business name, paper width, cuts, and barcode readability on the test results.
- If using a drawer through a printer, test the opening of the drawer according to the settings and cables used.
Barcode printer and scanner
The product barcode must be unique and consistent with the product data. Before you use it in the cash register, print out a label and scan it from the POS. When the scanner types twice or produces double Qty, check the Enter/Tab suffix, keyboard-wedge mode, scan repeat, and device orientation.
14. Multi-device, remote access, and digital payments
Kasirco Ritel Supporting Solo, Master, and Client modes according to business settings. Use solo mode for one device. In Master/Client mode, the Master device becomes the data source for the Client device in a specified network.
- Set up a stable network and determine the Master's device.
- In Master, open Settings → Remote Access & Multi Device; record the address/IP displayed.
- In Client, select Client mode, enter the IP Master correctly, and then test the connection before it is operational.
- Don't turn off the Master while the Client is still transacting. Finish the transaction and sync first.
QRIS, transfer, and gateway
Only activate the methods that are actually used. Enter the business gateway credentials through the Payment Gateway Settings, conduct a test transaction, and then match the status in the application with the providers' proof. For delayed transactions, do not charge the customer a second time before checking the transaction history and status of the payment provider.
15. Backup, restore, export and import of data
Backup is the protection of business data. Schedule backup before major changes, before restoration, and after operational shutdown. Save files on a business account with a date.
Backup and export
Open the data/backup menu that is available in Settings. Select a secure destination, wait for the process to be completed, then make sure the files are fully stored. Use CSV export on the Transaction History when you need transaction data in a spreadsheet.
Restore and import
Stop the transaction first, back up the current condition, pick the correct file, and read the warning. After the restore, check the user, the product, the stock, the cash, and the last transaction before reopening the safe.
16. License of the application
Check the package, the uptime, the purchase account, and the device identity on the information/license page. Purchases and recovery must be done with an authorized account. If the license is unreadable, check the internet and the device time, reopen the app, use the correct purchase account, and then select recovery of purchase when available.
17. Operational procedures for the day
Before it opens
Turn on the tablet/printer, network check, login to each account, absence, deposit cash, check the stock low and test print when necessary.
During operation
Scan/select products once, check the quantity and total, select members if available, keep cash out, don't share accounts, and postpone unpaid orders.
When it's closed
Finish a delayed order, check your digital transactions, book your physical cash, close your shifts, see your sales/cash/stock reports, back up, then exit your account.
18. Important term
19 A FAST wife
19. Common problems and safe measures
Barcode unread or double entry number
Make sure the product barcode matches and the scan column is active. Test with one scan. If the Qty is doubled, check the scanner settings (suffix/prefix, keyboard mode, or repeated scanning) and the device orientation. Close the app and open it again after making sure the scanner doesn't send two inputs.
The printer doesn't print
Check the power and paper, the Bluetooth/network connection, the selected device in the Printer Settings, and then test print. Do not press the printer repeatedly without checking the printer's queue to avoid duplicate strokes.
Cash or reporting figures are not appropriate
Check the date range, transaction status, payment method, user/staff, and deferred/paid transactions later. Compare physical cash to Cash Reports, then search the transaction history and inventory logs to change the data randomly.
The client device is not connected
Make sure the Master and Client are on the appropriate network, the Master's IP is correct, the device mode is correct, and the device does not block the local connection. Retest from Remote Access Settings & Multi-Device.
Step before contacting support
Record the time of the incident, order number, user name, steps taken, and screenshot of the error message. This information speeds up handling without repeating customer transactions.
Good operations start with neat data.
Use this guide as a daily work procedure and review the reports consistently.
Back to the top ↑